Another month, another game of teeny tiny tanks. I apologize to everyone for not posting up February's game, I failed to take any pictures for it, and it wasn't as exciting as many of our other games have been, so no big loss there. This month's game, however, was fast paced, with many wild swings of emotions as RNGeezus had his way with the dice, but fun was had by all and we had a good long discussion at the end of the game, which I will try to recreate here. As you can see by the pictures below, I went a little crazy with the terrain and stuffed as many hills and tree plates onto the table as was possible (we are still working on getting a larger 6 foot by 4 foot gaming table that is also taller so we don't have to bend over quite so much) and much grumbling was heard as Cross Checks are the bane of all of us, even Uriah with his 2+ Cross Checking Chieftains.
 |
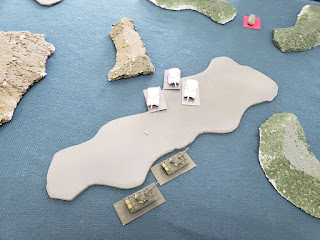
| From one end... |
 |
| ...and the other |
This month we had Uriah's British Chieftain Armoured Squadron take on Brandon's Soviet T-80 Shock Troop in a 75 point match. The Brits were pretty standard for Uriah - 8 Chieftains (two in the HQ, and two 3-tank Troops), a three Swingfire Troop, and a four Scorpion Recce Troop in the main Formation, and then from Divisional Support a three track Marksmen Battery, two Harriers, and two TOW Lynxes. Pretty standard fare, he went with Chieftains over Challengers to get another three tanks onto the table, not that he really needed them, but still had them available. On Brandon's side of things, he was pondering running Cubans from the new Red Dawn supplement, but I convinced him to try something outside of his comfort zone: high cost T-80 Shock Tank Company from the Soviets. If you look back into our history, both Brandon and I tend to run very low cost horde lists when we play WarPact, usually from the East Germans or Polish Warsaw Pact lists, and we both need practice running much more expensive, higher performance but lower Unit count lists. This was a list I'd been playing around with on the TY Forces Builder, and while the T-80s are fantastic vehicles, maybe a little too expensive to face off against Chieftains, and I should have suggested a T-64 Tank Battalion list I was also playing around with. Oh well, Brandon went with the T-80 Shock Company, which gave him five T-80s (1 HQ, and two 2-tank platoons), a 3 count of BMP-3 scouts, four Shilkas, and three Carnations in the company. From Divisional Support, he had a BMP OP, two Storms (with the wimpy AT-6 Spiral, these were chosen to spend 2 points and get something semi-useful), and two Mi-24 Hinds (with the better AT-9 Spiral-2... which didn't matter, more in a second). Neither of us have played around with the T-80 or T-64 Soviet lists, so this was a learning experience for both of us. For the mission, both players chose Attack, and then a one was rolled, resulting in Contact. To see who was Attacker and who was Defender, Brandon won the roll off, making the Soviets the Attackers. Both sides had Reserves, Uriah putting a Troop of three Chieftains, his Swingfires, and the Lynxes in Reserve, and Brandon put in his HQ, a company of T-80s, and the OP.
 |
| The Soviet Force. |
 |
| The British Force. |
 |
| Selections and the result is... |
 |
| ...Contact! |
 |
| To decide Attacker. |
 |
| British Reserves. |
 |
| Soviet Reserves. |
DEPLOYMENT - Contact, which we seem to have gotten a lot lately, is pretty basic. Both sides are roughly the same, with the Defender's Deployment zone being slightly larger. Each side places two Objectives inside the opposite side's Deployment zone, and they are live on Turn One, so you better not ignore the ones in your area to go haring after yours across the table. Attacker gets Immediate Reserves and gets to pick Daytime or roll on the chart (Brandon picked Daytime), and Defender gets Ambushers and Scattered Delayed Reserves. Uriah places his Objectives down, and pretty close to each other. Brandon places his Objectives with a decent separation between the two. I am of the opinion that spreading out the Objectives I place on your side of the table doesn't allow you, my opponent, to concentrate your Units in one area of the table, you've got to spread them out to cover everything. Uriah is of the opinion that putting your Objectives fairly close together means that he, the person attempting to take those Objectives, can focus his Units into just one area of the table when it comes time to attempt the Objectives. I think the real answer of whether you should space your Objectives or cluster them together, as many things do in this hobby, is "it depends". And as I am typing this, thinking I'm the second coming of Sun Tzu or von Clausewitz and just had a revelation, I realize that whether or not you push your Objectives together or spread them far apart, it all depends on how you make your opponent react to you. Uriah makes it work here (sorry, should I have yelled SPOILERS!!! before typing that? oh well, too late now) but both Brandon and I have, in the past, made him suffer for allowing us to use fewer defensive Units to cover the Objectives and use the rest in attacking the Objectives on his side of the table. But that goes back to us making him react instead of act. If you can get the initiative and keep the momentum going, do it.
Uriah's Deployment was really good for what he had, he covered both Objectives with one reactionary force (his Chieftain HQ and his Marksmen) and then one of this Chieftain Troops and his Cockroaches Scorpions bracketing the Objective to his left. Placing the Marksmen where he did, to cover practically the entire table (more on this in a moment), was very fortuitous for him. Brandon placed his Units next, more to the WarPact right/NATO left where Uriah's Objectives sat, also keeping his Shilkas in the middle of the table to cover the most ground - though now that I think of it, if none of your Units are on one end of the table, you can cheat your AA closer to the end of the table your Units are occupying, because if the Airedales show up on the end you can't reach, they are out of range themselves so who cares? Unless they are heliborne troops and moving around to better attack you, and then you should pay attention, but in this particular game, Brandon and Uriah both could have moved their AA assets closer to the middle of their formations instead of middle of the table, and both had better coverage of their Units. Brandon does eventually bring something in further towards his left flank, but that is several Turns away.
 |
| There is a third of the table that nothing is happening on, not pictured. |
 |
| The Brit command and AA overlooking the Objective to their right. |
 |
| The Chieftains overlooking the Objective to their left. |
 |
| Scorpions in the treeline, facing off against a lot of Soviets. |
 |
| The Soviet right flank. |
 |
| The Soviet "middle". |
 |
| Soviet left flank. |
TURN ONE - Our little Team Yankee group has made a couple of rule discoveries the past couple of games, and I am going to talk about them here before we really get started into the meat and potatoes of this Turn. The first one is the Movement Order Shoot 'n' Scoot - you can only attempt a Shoot 'n' Scoot if you did not Move before the Shooting phase. Didn't know that, thought you could do a Move, shoot, and then do a Shoot 'n' Scoot. The other isn't so much a rule as it is a Weapon Ability - Radar. In our last game between myself and Uriah, my East German Shilkas were not of much use, what with their paltry 20" range on their 23mm cannons. Uriah kept bringing in his strike aircraft just outside their range and shooting up my tanks. But what both of us missed is Radar, which adds 12 whole inches of range when you are shooting at aircraft! Unfortunately for Brandon, he had missed that as well, and I happened to mention it... after he had already placed his Hinds on the table in Deployment. Lessons Learned: Read! Read the rule book, read the cards for EVERYTHING, because if you're like us and have a lot of rules in your head from other games and previous editions of Battlefront games, you'll be missing out on some important info or misremembering how the game is supposed to be played.
The Soviets, having also been informed of the Weapon Ability their Shilkas also have, moved them closer to the end of the table to cover their Units better. The Hinds and the Recon BMP-3s move to engage the Scorpions to their immediate front, and the one Company of T-80s on the board attempt a Blitz, fail it, and sit where they are. The Storms and the Carnations, having to fire from stationary do not move. The BMP-3s rain some hell on the Scorpions, and then the Hinds prepare to fie, and both are shot out of the sky by the Marksmen because while we thought they were out of range in Deployment, after remembering Radar was a thing, they were very much in range. The Storms Bail one of the Chieftains they could see just poking out from behind a copse of trees across the table, and the T-80s shoot at the Chieftain HQ element, but nothing happens there. The Carnations self spot and Range In on the Scorpions, ending up, between the BMPs and the arty, one Destroyed and One Bailed. Also, even with Immediate Reserves, none came on this Turn.
I'm going to break to have another Lessons Learned discussion here, yes, about knowing what we knew at the end of the game we discussed doing all the way back here at the front of the game. With the intimate knowledge of the Radar Ability, on top of the small play area (remember, in our little group, because we are playing at 6mm scale, we have decided to halve all distances, except for weapon ranges), we discussed that maybe Brandon should have kept his Hinds in Reserve and juggled points around to bring out other Units, or even from the start, moved the Hinds to the complete opposite side of the board into one of the few parts of the board the Marksmen could not reach and see if Uriah could be tempted into moving the Marksmen away from covering the far side of the table. I would have gone with the former, and tried to bring out the OP and if at all possible another T-80, using said OP to get a Ranged In on the Marksmen to remove them with Artillery and then bring the Hinds in from Reserves. Another option that I have just thought of and have not discussed with my compatriots is we also halve the distance on all weapons, too. Yes, we are working on building a new table as I type this and I hope to have both the table and a DIY instruction post here on Truncheons & Flagons before we have our game in April, and that will help with the dominance of AA assets on helicopters and strike aircraft. Also, we purposefully kept weapon ranges as is, as modern weapon systems have so much range compared to what they can drive, it feels just that much more realistic playing it this way. The other part of this is we probably need to put in a game day where we do nothing but run through the rules one step at a time - were the Marksmen clear enough of the hill they were behind to shoot at the Hinds? we gave the Hinds a +1 Cover bonus because there were multiple stands of trees between them and the Marksmen, but was that not enough or too much? Until we think on it more, I believe I am going to be removing strike aircraft from my lists and use those points for other assets.
On the British side of the Turn, both Bailed vehicles Remounted (yay!), the Harriers get called in (woohoo!), but no rolls for Reserves until Turn Three (boo!). The Chieftain Troop under the watchful eye of the Storms moved into full cover behind a stand of trees... and that was it for movement. The Harriers and Scorpions fire at the BMPs to their immediate front, Destroying one and Bailing one. The Chieftain HQ element fires back at the T-80s, Destroying one. This Turn was really the beginning of RNGeezus not liking Brandon very much, as in his Shooting phase he made several hits that were not saved by Armor, but he rolled a one on Firepower. The Dice Gawds definitely did not favor Brandon on this day.
 |
| Shilkas moving up, and the Blitz token denotes a failed Blitz, in this case. |
 |
| Hinds and BMPs moving up on the right, and not much else for the Soviets. |
 |
| Burning Hinds and damaged Scorpions. |
 |
| Storms manage to Shoot 'n' Scoot back into cover. |
 |
| British HQ, AA, and Chieftain Troop. |
 |
| Chieftains Remount and move up into cover. |
 |
| Harriers come onto the table, and the Scorpion Remounts. |
 |
| T-80s catching fire. |
 |
| BMPs catching a lot of hate. |
TURN TWO - The Soviets manage to Remount the Bailed BMP-3 from the Recon element, and also got a Company of T-80s onto the board from Reserves. Except for the T-80s moving up and the Shilkas continuing to move further to the extreme WarPact left (but also closer to the long table edge), no other movement was seen from the Soviets. Brandon brings the T-80s in on the left of center, threatening the Objective on that side of the table that has thus far not been remotely close to any action. The BMPs fire at the Scorpions and the Carnations repeat their bombardment, managing to Destroy one more Scorpion (I'm telling you, they're Cockroaches!). The Storms fire at the Marksmen from their new position and manage to Bail one. The T-80s that were already on the table fire at the Chieftain HQ once more... for yet another null result.
The Brits once again manage to bring on the Harriers (who are in an even smaller slice of the table that the Shilkas can't quite reach, even with Radar) but fail to Remount their one Bailed Marksman. The Chieftain Troop that was protecting the Objective on NATO left now Dash to cover the other Objective, reacting to the newly arrived T-80s. In Shooting, they wipe out the remaining BMP-3s, catching fire from the Harriers and Scorpions again, as well as the T-80 Company that had suffered a casualty last Turn.
 |
| T-80s on and moving, and Shilkas moving in the background. |
 |
| Shilkas moving. |
 |
| Remounted BMP-3. |
 |
| Bailed Marksman. |
 |
| Burning Scorpions. |
 |
| Here come the Harriers... again. |
 |
| Chieftains Dash to watch over the other Objective. |
 |
| Burning T-80s. |
 |
| Burning BMP-3s. |
TURN THREE - The Soviets get in the last of their Reserves, the lone T-80 HQ track and the BMP OP (we have been having a discussion in the group of replacing the BMP OP with something else, as all they have is an MG and no cannon or missile like the BMP-1 that Battlefront uses as both the model and picture in the book; however, in reality, the BMP OP should be a PRP-3 "Val" which is based on the BMP-1, but just a different turret, unlike what is provided from BF; still not decided if I want to make up an OP with a UAZ-469 or just cut a cannon off the turret front on one of the MANY BMP-1 minis I have and call it a day) which the T-80 immediately tucks into cover behind the burning T-80s in the middle of the Soviet line, and the OP tucks in behind the Objective behind the T-80s. I discussed this with Brandon and think he could have used his OP as a distraction, coming onto the table on one extreme or the other, and Dashing forward to make Uriah react to its presence and maybe sneak in for a Capture on an Objective. Brandon did admit that he should have done something with the OP, even getting it into a spotting position so he could Range In on a Unit across the table. The T-80 Company that had arrived last Turn moved up to put some rounds onto the Marksmen and Chieftain HQ in the rear of the British Formation, and the Storms Blitzed and lined up to do the same from the other side of the fight. RNGeezus continued to show Brandon disfavor and nothing resulted from the five vehicles (T-80 HQ and Company, and the Storms) firing on the Brits.
In the British half, Delayed Reserves finally arrive (yay!), but none arrive on the table (boo!). The Marksmen fail to Remount, again, and the rest finally move away from their starting positions, as there were no more aircraft forthcoming so they might as well be doing something (Lessons Learned - once all your enemy's aircraft are down, all of your AA assets are better off doing SOMETHING: gun AA can go after infantry and lightly armored vehicles, and even missile AA Units can either attempt to Capture Objectives, or move close to your own to deny your opponent an easy Capture, though if you are using Victory Points, try not to "feed" your opponent too much). The Chieftains that had moved to cover the Objective on the NATO right side of the table continued to maneuver to deal with the encroaching T-80 threat from that side of the table. The Scorpions also attempted to leave the woods they had been in from the start, one successfully making their Cross Check, and the other Bogging. Not a lot of Shooting going on this Turn for the Brits, as most of the moves were Dashes of some flavor, more preparation to get to grips with the Soviets in the following Turns.
 |
| Turn Three, let's get it on! |
 |
| T-80s maneuvering to fire on the Units at the rear. |
 |
| T-80 HQ and BMP OP (represented by the BTR to differentiate it) arrive from Reserves. |
 |
| Storms Blitz to get Line of Sight onto the Brits. |
 |
| Chieftains moving to deal with the T-80s. |
 |
| Marksmen and Scorpions on the move. |
 |
| Scorpion Bogged in the trees. |
TURN FOUR - The Soviets shifted slightly, the Shilkas coming off the back edge of the table to either engage ground targets or try and catch the Harriers if they return, or Lynx helos if they show up from Reserves this Turn. The OP moves up a little bit as well, but not very far, just to keep it out of the line of fire that the T-80 HQ is receiving from the Chieftain HQ element across the table. Again, more ineffective Soviet Shooting occurs, resulting in just one Marksmen Bailed. Damn you, RNGeezus!!
On the British side of the Turn, you can definitely start to feel the momentum is in the Brits' favor. No Reserves again, but everything Bailed Remounts, and the Bogged Scorpion passes their Cross Check this time to join up with the other Scorpion that has boogied out onto the table. The Chieftains move into the trees far enough to get shots (with Cover) on the T-80s threatening the NATO right flank. The Marksmen all gather up and pour fire into the Storms, wiping that Unit from the table. The Scorpions fire at the Carnations and Destroy one as well. The Chieftains in the trees fire on the T-80s, Destroying one and Bailing the other, putting the Soviet Unit perilously close to leaving the table.
 |
| Turn Four, FIGHT!! |
 |
| Shilkas and BMP OP moving up. |
 |
| Storms Bail a Marksman. |
 |
| Scorpions rejoined. |
 |
| Chieftains moving to the attack. |
 |
| Marksmen Remounted and joined back up. |
 |
| Burning Carnation. |
 |
| Burning Storms. |
 |
| Burni... I'm sensing a theme here. |
TURN FIVE - The Soviets continue their unlucky streak, as the Bailed T-80 Remounts, just to fail Morale and leave the table. This leaves the HQ element, the Shilkas, and the two remaining Carnations from the core Shock Tank Formation, and the OP from Divisional Support, so no Formation Morale checks yet. The Shilkas and Carnations both move up to fire on the Scorpions, while the HQ and the OP stay where they are at. The Scorpions are FINALLY taken out in firing, and the HQ T-80 manages to Destroy one of the Marksmen.
The British FINALLY get some Reserves on the table, but still only one Unit rolling three dice. The final Troop of Chieftains comes on, Scattered die says "middle of the table", and they enter onto the table just beside the Objective on the NATO left flank. They immediately move forward to get into a blocking position and cover the lanes of approach leading to that Objective. As the Shilkas fired at the Scorpions, the Brits roll for Harriers and get them onto the table as well. The Chieftains who had just successfully removed a Company of T-80s attempts to cross the trees they are in, and two of the three tracks immediately Bog. I don't know what it is with our small group and Cross Checks, but they are everyone's bane. Remember, Chieftains have a 2+ Cross Check, and still two out of three failed it. The Marksmen also move up to add their fire (well, from at least one of the tracks if not both) at the Shilkas. The Harriers and Marksmen wipe out the Shilkas (Marksmen killed one and Bailed two, and the Harriers finished the job killing three).
 |
| Turn Five, let's go! |
 |
| Last T-80 of that Company headed for the hills. |
 |
| Shilkas moving up. |
 |
| Carnations moving up. |
 |
| Burning Scorpions. |
 |
| Another shot across the table. |
 |
| Burning Marksman. |
 |
| Chieftains (not) on the move. |
 |
| Marksmen, newly arrived Chieftains, and the Harriers. |
 |
| Better shot of the Chieftains. |
 |
| Chieftain HQ: "no, we're good right where we're at, thank you." |
 |
| Burning Shilkas. |
 |
| Spoilers! This is the End! |
DENOUEMENT - With only the T-80 HQ element, two out of three remaining Carnations, and an OP track, Brandon decided it was the better part of valor to concede the game at this point. I don't really blame him - he was down to two core Units, and only four vehicles total on the field, while Uriah still had two Units in Reserve (Swingfires and Lynxes) that were definitely going to arrive this Turn. We had a lively discussion about possible solutions. If I had been playing the Soviets, with the two Objectives that close together, I would have immediately charged across the table to attack the Objective on that side and ignored the other half of the table completely... but that may still not have worked, I am not the second coming of Rommel, after all. Brandon and Uriah both thought that Brandon could have helped himself better by mixing up what Units were in Reserve - definitely leave the Hinds and bring the OP in, try to use arty to kill the Marksmen before the Hinds come in from Reserves; try to get in the HQ element as well, but other than the Storms, there's not much else that you don't desperately need (Shilkas to kill planes, Carnations to kill Marksmen) to balance out the cost, though maybe the Recon Platoon if you're not going to use their Spearhead to really jump out across the board in Deployment like I suggested.
On the other side of the equation, the British Harrier is an excellent strike aircraft (3+ to arrive on table instead of 4+ for everyone else), but it is VERY short ranged in its weapon selection. If your opponent has remembered to read the back of their Unit cards and has a good grasp of how effective their AA assets truly are, Harriers are going to spend a lot of time loitering off table or at the edges until you get said AA assets off the table, or entice them to shoot at something else so they can't fire at the Harriers. I think Uriah played this very well, he started very defensively, but flipped it to aggressive when it became apparent that was what was needed. And going with Chieftains against WarPact, even technically superior T-80s, was the right move. Challengers could have driven forward and shrugged off cannon fire more easily, but in this case, the Chieftains had enough armor (and Brandon enough bad luck) that Uriah didn't lose a single tank. The game-long run of bad luck Brandon suffered through (I have never seen so many ones come up for Firepower 2+ weapons) also did not help, but I think Uriah worked his Cover and when he engaged with the Chieftains, he did so from a superior firing position. Again, if you are playing British, bring Scorpions/Scimitars in every list, it took FIVE TURNS to kill four Scorpions this game. They are resilient, to say the least.
I really should have suggested the T-64 Battalion list I've been playing around with instead of the T-80 Shock Company - 9 tanks instead of 5, plus a BMP-1 Motor Rifle Company (4 tracks, 3 RPG-7 stands, and 4 rifle teams), an extra track in the Recon element (and swapped to BMP-1s), and four Su-17 Fitters (with the Kh-25 missiles) instead of Hinds. In Contact, with 40% of the force in Reserve, I would put one of the tank Companies and the Fitters into Reserve (unless the rules state that strike aircraft can't be in Reserve, I misremember right now and don't have my rule book to hand, and it would depend on if I was playing Attacker and getting Immediate Reserves or Defender with Scattered Delayed what I would put out in the Fitters' place). This let's me use the arty to soften up the AA assets and the infantry to sit on the Objective (or both if they're close like Uriah prefers to place them) and practically everything else to use the Recon's Spearhead to get as far across the board as possible to assault one of the Objectives as early as possible. Yes, I'm still convinced this is the way to go, put your opponent on the back foot and don't let up until the game is over. Or you could hunker in for a good defend, get your infantry out and Dug In doing overwatch on one of the Objectives (BMPs also in cover supporting) with the tanks on the other, from out of the nearest chunk of Cover and let your opponent come into the killzone.
There you have it, a bunch of pretty pictures, the wild meandering thoughts of a mad man, which I hope you garnished some insight from. Hope everyone is doing okay, and I hope you get to play some games with your friends very soon. See you all next month!


No comments:
Post a Comment