Finally, the traveling is done for my job (for now) and I got to try out the "new hotness", the new gaming table I built for the group and I have to say that, even though I was focusing almost exclusively on all the imperfections, it was still an excellent table to play on. Why was I focused on the imperfections? When I create something, that is all I see, I am just one of those people, sadly. Anyway, the table was fun to play on, and it's huge, so I wanted a huge fight. "We have all this room," I said to Uriah, "let's really throw down - 150 points!" He said no, that'd take too long, he wanted a shorter game. "Okay, we'll do Blue on Blue, my Americans with their fancy tanks versus your Brits with your fancy tanks, no horde lists, no infantry." He agreed to that, and to list building I went. So, can't do a horde of M60 Pattons, I want to do more spendy tanks, but not so spendy I don't have anything to support them with, so 105mm gunned M1 Abrams it is. Only one tank in the HQ element and three full platoons of four tracks each make the core of this list, and a terrifying hammer it is. Also in the main formation, a two tracks element of M901 ITVs with TOW-2 missiles ('cause I had to spend a point somewhere and it put these in line with everything else in the force), and two, two-track M3 Bradley Scout Sections. All that Spearhead-goodness really helped out, which we'll discuss momentarily. From Divisional Support, a six barrel battery of M109s with minelets (I was hoping, since none of the NATO units have mine plows these would be a huge PITA for Uriah, but nope, never used them), a M113 FIST, four VADS in an AA platoon, and two A10 Wathogs (yes, yes Fairchild Thunderbolt IIs, but to me, they will always be Warthogs). The first iteration of this list had three fewer Abrams and a whole mess of other vehicles - RDF L/Ts, mech infantry, M106s, and Chaparrals, but I promised a quicker game with fewer, more expensive vehicles, and the above is what I came up with. It worked pretty well, though my A10s did not show up often, and when they did, I was too timid with them and they were ultimately ineffective.
 |
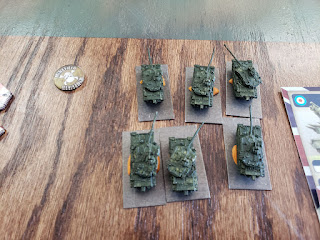
| The mighty US Force cards. |
As for Uriah's force, he brought a Challenger Squadron - two tracks in the HQ with two, three track troops, three Swingfires, and four Scorpions for his recce needs. Then from support, he brought three M109s, a FV432 FOO, three Marksmen, two Tracked Rapiers, four Harriers, two TOW Lynx, and three Chieftains (and a partridge in a pear tree). This is nastier than it looks, because I only had a few weapons that could threaten the Challys from the front (TOWs and the Mavericks the A10s carry) and where I had reduced my AA capabilities, Uriah had expanded his and the number of aircraft he was bringing. The Chieftains are very close, stats-wise, to my M1 Abrams, with some give and take between the two, but the Challengers are hands-down winners versus 105mm Abrams - better armor and a better gun. And the Scorpions (we call them "cockroaches" for a reason) are generally so hard to kill they occupy many more Units than you would think necessary. It looked like it was going to be an ugly fight.
 |
| The mighty British Force cards |
As usual, we threw as many pieces of terrain onto the board as we could stand and went to town. Doing Blue on Blue, I picked the Red cards and went with Attack, while Uriah picked Maneuver from the NATO choices. Just a side note, I saw an announcement for an upcoming TY tourney, and they said out of the four fights you were guaranteed to have, you would have to use the three combat choices (Attack, Maneuver, Defend) at least once during the tourney. I think that is neat and adds a layer of strategic thinking - okay, I'm Attack focused, when do I throw down with Defend? When will Maneuver give me the best advantage? Anyway, with the sides chosen, Uriah rolled and we got Escape, which worked out well, as we were already set up at the opposite short sides of the table. My brain was not working 100% and I was having trouble doing math and adjusting to a full-size table where we didn't have to take an extra step to adjust our distances across one dimension of the table, but in the end, we figured it out and we setup our forces.
 |
| Mission - Escape! |
DEPLOYMENT - being Defender, Uriah had to deal with protecting both Objectives, and yes, I placed the one that was closer to my Deployment Zone and as far away from any hills or trees as I could get. Uriah did a good job placing his forces and especially his six (SIX!!) minefields to funnel me away from the more accessible of the Objectives. I used my two sections of Scouts to Spearhead almost all of my Abrams tanks 14 inches (we halve all movement distances... which did neatly put me the necessary distance away from enemy Units) closer to the Objective on the US right/British left. I almost put my HQ track into the Spearhead as well, but I'm glad I did not as I had failed to notice that the Defender's Immediate Reserves would Deploy BEHIND my Units. And yes, for his Ambush, Uriah chose his Chieftains, and for Reserves, he chose his two Troops of Challengers. I scared him with the hammer of Abrams heading his way, and he scared me when his Challys came onto the table behind me. It was going to be an exciting game.
 |
| British Reserves. |
 |
| British Ambush. |
 |
| A look across the field from behind the British right flank. |
 |
| Most of the US Force. |
 |
| TOW Lynx ready to pounce. |
 |
| British M109s assessing potential targets. |
 |
| British Ranged In marker. |
 |
| British minefields (left and top), and US Ranged In marker (hilltop). |
 |
| The schwerpunkt. |
 |
| US Units behind the main hammer. |
TURN ONE - Escape is an odd Mission in that the Defender goes first, not the Attacker. Attacker does get to pick time of day, but since we were both playing NATO, I chose to stick to Daytime just to keep everything flowing faster, though I would have chosen to try and get either Dusk or Dawn if I had been playing US versus any of the WarPacts not Soviet, as their night vision equipment is sub-par. Uriah rolled for and got both a set of Reserves and his Strike Aircraft, the latter of which he aimed straight at my VADS and the former at the center of my rear areas, the M109 artillery. He rolled out his Scorpions (Cockroaches) and maneuvered his Lynx in to fire on my Abrams. In the shooting phase of the Turn, he managed to kill three Abrams (one from one Platoon and two from the other) with shots from the Swingfires and the Lynx, and an artillery bombardment from the M109s. The Challengers from Reserves don't fire because they Dashed, trying to get into the fight in future Turns or get to a firing position next Turn where they could use a Halted ROF. The VADS and the Harriers go after each other, hammer and tongs, with two Harriers crashing to the ground but the Americans losing three out of four VADS. I knew I should have kept the Chaparrals in my army list. I did try shooting at the Lynx with the AA .50cal MG on the FIST, but that produced nothing (you miss every shot you don't take, and I didn't figure I had the FIST in a position to Range In this Turn anyway).
 |
| Chieftains appear from Ambush. |
 |
| Scorpions and Lynx maneuver British right, US left. |
 |
| Challengers from Reserves Dash onto the table. |
 |
| Four Harriers going after four VADS. |
On the American side, I push all the pedals to the metal and charge into the teeth of my opponent. Remember, I automatically lose if I don't have a Unit within two inches of one of the Objectives at the beginning of Turn Six, so no playing this one safe, time is NOT on my side. The roll for Strike Aircraft fails, but the passed Morale check on the VADS means the lone track is staying on the board. I sneak a Platoon of Abrams and a Section of Bradleys around the far right (US right, British left) table edge, avoiding minefields and getting clear Line of Sight to the Swingfires. The other Spearhead block charges pretty much straight ahead, looking to get to grips with the Ambushing Chieftains between them and the Objective, and get away from the Ranged In marker. Anyone else who is bored and not doing anything (both Bradley Scout Sections and the M901s) fires at the FOO, but barely manage to Bail the vehicle. The M109s swivel turrets and fire at the approaching Scorpions and Challys. The HQ track maneuvers to try and get Side Armor shots on the Challys as early as possible. The Swingfires are wiped off the map. The M109s take one Scorpion off the board, and then I realize I can't penetrate the Challengers from the front, not even Direct Firing a 155mm howitzer, so I use those M109s to put smoke in front of the Challengers - if I can't Destroy or Bail them, I can force them to move (or at least check for a Blitz move) to get around the smoke and lower their ROF to one.
 |
| "Bad" guys to the rear... |
 |
| ...and to the left. |
 |
| CHARGE!! |
 |
| CHARGE!! (take two) |
 |
| Those are smoke markers. |
 |
| Swingfires go bye-bye. |
 |
| M109s shooting at Scorpions. |
 |
One burning Cockroach, I mean, Scorpion. |
TURN TWO - Again, Uriah gets his Reserves and Strike Aircraft, the former being his last Troop of Challengers which come on threatening the very edge of the table (US right/British left, same narrow alley I ran a Platoon of Abrams and a Section of Bradleys up last Tutn); and the latter going right back after the remaining VADS. The smoked Challys that came on last Turn move Tactically up past the smoke and commence firing on the M109s. The freshly arrived Challys Dash to make up some ground across the board. The Marksmen withdraw as they don't want to face the American 105mm cannons heading their way. The HQ element adjusts to fire on the Abrams cresting the hill in front of the Chieftains, while those same Chieftains make a Cross Here check to shift to face the Abrams coming in from their left flank. The Lynx move to better engage the same block of Abrams and Bradleys, and the Scorpions head for the rear of that group of tracks. When Shooting commences, the lone VADS manages to take out one of the two remaining Harriers, and the remaining Harrier fails to do anything in return. The Challys that arrived last Turn light up the M109s but only manage to Destroy one of them. The FOO (which had remounted at the beginning of the Turn) Ranges In again on the Abrams practically within spitting distance, and the fire from the British M109s and the Lynx manage to Bail one of the Abrams.
It is at this point, while typing this up, that I realized I had made an error. That block of Abrams (two Platoons worth with a Section of Bradley Scouts), last Turn I moved them Tactically, fired at the Chieftains (causing no damage) and then I did a Shoot n Scoot with them to get them off the hill... which is illegal, you can't do that maneuver unless you did not move or Assault that Turn. They should have still been up on the crest of the hill, to be fired at by the Chieftains and the HQ Challengers. My apologies to Uriah, it was not done on purpose.
 |
| Two Harriers versus one VADS. |
 |
| Challys shoot up an M109. |
 |
| Marksmen adjust back and Chieftains shift to better cover their left flank. |
 |
| Lynx going after Abrams. |
 |
| One Bailed |
Back to the game and the American half of the Turn - the Bailed Abrams remounts! The last, lone VADS fails Morale and scoots off the table! I finally get Strike Aircraft on! Yes, this was a bit of a rollercoaster for me emotionally, but just wait until Shooting when... well, I won't spoil it for you, it's coming real soon. I placed the A10s at the very edge of the table, JUST outside of range of the Tracked Rapiers at the other end of the table. I still don't know how effective missile AA is versus the hearty Warthogs, so I was playing super cautious with them. I manage to Blitz the FIST to a spotting position so I can use my M109s as the artillery they are meant to be, but what about the Challys coming up from their 6 o'clock? Well, that was part of the plan with the A10s - if I attack that Troop with the 'hogs, with no other AA cover available, Uriah will be tempted to use the AA MGs on the Challys and won't be able to shoot next round anyway. It was a very big gamble, but time is running out (or so I thought) and I need to get something onto one of the Objectives in the next two Turns (actually three, more on this in a bit) or I automatically lose the game, so I need to move forward with the units around that Objective that has become the schwerpunkt as much as I can and ignore everything else. The Abrams I had pulled back off the hill (illegally) charge right back over, keeping the trees in between themselves and the Challenger HQ element. The Abrams on the flank turn the corner to also face the Chieftains. The Bradleys with the flank follow, and the other Section of Bradleys maneuver to face down the Scorpions coming up from the opposite flank. And the HQ Abrams maneuvers to get Side Armor shots on the Challys threatening the M109s. This is the true benefit of the Abrams tanks - a fast Tactical speed (14 inches compared to 10 inches of practically everything else, which becomes 7 and 5 respectively in our 6mm scale version of the game) and ROF two even while Moving. In Shooting, it's another rollercoaster, as my first three attempts at hitting anything fail. A10s shooting Challys (which do try to strike first with AA MGs, so that gamble paid off at least, and no A10s were shot down) was a total miss. HQ Abrams was a total miss. M109s manage to Range In on the Marksmen 2nd roll, then miss one and hit the other (even with five barrels still up and rerolling my miss, I missed again), but that SPAAG makes Armor Save easily. Then eight Abrams unload 16 shots on the Chieftains... only to Destroy one of them for all that noise and thunder. The Bradleys on the flank and the M901s (who I probably should have been moving by now) finally Destroy the FV432 FOO. The Bradleys facing the Scorpions Destroy one and Bail the other two. See? Lots of RNGeezus giveth, and RNGeezus taketh away happening.
 |
| I assure you, those stands represent my A10s. Yes, yes, another project on the pile. |
 |
| Scorpions catching hate from the Bradleys. |
 |
| All that fire from the Abrams for one Destroyed Chieftain. |
 |
| I did at least get that FOO. |
 |
| Marksmen catch artillery fire for no effect. |
TURN THREE - Where my dice had gone mostly cold last Turn, this is the Turn where Uriah's dice went cold. We also did not have Brandon's big, red d12 keeping track of which Turn it was, and I'm pretty sure at this point both Uriah and I agreed it was Turn Four. Uriah had his entire Force on the table at this point, and even though he had already lost one of his Formation Units (Swingfires), he was still In Good Spirits, so no Formation Morale. He fails to get his Strike Aircraft, the one, lone Harrier, back onto the table. He does manage to Remount one of the Scorpions but then they fail Morale, and become the first of the Brits to scamper off to home. The Challys in the American backfield, seeing that I am going to throw everything nearby at that Objective (because we think our clock is further ahead than it is) ignore the targets around them and Dash as far forward as they can. The Brits roll plenty of dice in Shooting, but like I intimated earlier, not much happened. The Challenger HQ element and the Chieftains and the TOW Lynx fire at the Abrams they have clear Line of Sight to, but only manage to Bail one track, which immediately Remounts in the American half of the Turn, and Destroy one track out of the last, full strength Platoon coming in from the flank. I did just notice that, having lost the FOO, Uriah didn't do much with his M109s the entire rest of the game, and if nothing else, could have used them to sit directly upon the Objective, freeing up his HQ to do some more maneuvering of their own.
On the American side of the turn, I fail to get Strike Aircraft back, but do Remount the one Bailed Abrams, and it's back to driving towards that Objective. Starting in the backfield, I make a Blitz roll and shift the M109s just enough to get them all on line and unmask their guns so they can all fire without incurring a Slow Firing penalty. Better yet, they are aimed directly into Side Armor of one of the Chally Troops. The HQ track follows up (no Blitz needed, just a straight Tactical move) and line up in the rear of the other Chally troop. The M901s, not wanting to stick around, motor over the hill they are on and head towards the where the FIST is at, see if they can threaten the other Objective. The Platoon with three remaining Abrams sits where they are, while their neighbor Platoon with two tracks moves around the stand of trees the Chieftains are in to put rounds into the Marksmen and threaten the Objective from US right. The last Platoon of Abrams move up just enough to get all three guns on line to shoot at the Chieftains. Meanwhile, the Bradleys in the center move back to where they were, and the other Section Dashes forward to the other side of the hill the Marksmen are hiding behind. As Shooting commences, my cold dice run suddenly hot and I start Destroying vehicles left, right, and center. In the backfield, both Chally Troops lose two out of three tracks to Side Armor shots from the M109s and the HQ Abrams, forcing Morale checks next Turn. Out of the Chieftains, I Destroy one and Bail the other. The Marksmen catch rounds and outright lose two of their three tracks to 105mm cannon fire, also forcing a Morale check next Turn for that Unit. Again, RNGeezus giveth, and RNGeezus taketh away.
 |
| The Scorpions fail Morale and run away. |
 |
| Burning Challengers in the American backfield. |
 |
| American Abrams swarm to the Objective. |
I should have taken more pictures of that Turn. *feh*
TURN FOUR - For Uriah, disaster strikes hard. No Strike Aircraft this Turn. Already down to three out of the five core Units from his Formation (the Scorpions and Swingfires having already left the party), he then fails the Morale checks for both of his Chally Troops. That is it, he is down to one and only one Unit left in the Formation, the Challenger HQ Unit. This is where we made another mistake, as we both thought (or had forgotten this wasn't true) the Chieftains were a core Unit, but they're not, they come in from Divisional Support. No Formation Morale check is made, but I am not salty over it as I type this, as continuing the fight was more interesting than just winning right here. At the time we thought everything was kosher and kept going. The Marksmen that I mauled last Turn make their Morale check and stay in the fight. Uriah keeps the TOW Lynx at the edge of the battlefield, as we had both remembered that the Bradleys' Bushmaster cannon has Anti-Helicopter as a Weapon Ability, and I was going to start using my Scout Sections as impromptu AA pieces. The Chally HQ shifts over in the woods, using another Cross Here check to bypass the Cross Check, you know, the ones our little group seems to fail so much. This puts them on the other side of the Objective. In Shooting, the TOW Lynx manage to Destroy one Abrams out of the three track Platoon, and the HQ Destroys one track out of the two track Platoon, and not much else is left to shoot because everything else is out of Line of Sight.
 |
| Challenger Troops have left the building. |
 |
| The blue die is a reminder to check for Unit Morale. |
 |
| TOW Lynx on the extreme edge of the battle. The black dice are holding down the hills they are on, as it was a hot day, we had the windows open, and it was a bit windy. |
Back to the Americans (cue NSFW theme song), who again fail to bring the A10s back out to play, but do pass the Morale check for the Abrams Platoon. Remember, I'm still under the impression this is Turn Five, so I think I have to get one of my Units onto the Objective NOW! or I'm going to lose the game at the start of the next Turn. With just one track left in that Abrams Platoon that I just made Morale with, I know I am not going to have it long, so I might as well get some use out of it, and Dash it across the table to contest the Objective. With that taken care of, I prepare for a long slog of wiping out the last pair of Challengers and anything else Uriah throws at the Objective to keep me from capturing it. The American M109s are now Dashing up the table heading g for the other Objective to try and divert some resources that way. The Bradleys in the middle of the table move back to the reverse slope of the hill, hopefully to get TOW missiles into the remaining Chieftain next Turn, if it becomes necessary. The Abrams HQ track Dashes up table to try and support the Objective capture where all the action is occurring. The other Bradleys, well, I couldn't get to a good shooting position with them, so they sat and looked threatening. The other two Platoons of Abrams move Tactically past the Chieftains for the Challengers to start putting rounds into them. Even the M901s leave the hill they were hiding behind and Dash forward to do... something, not really sure what I wanted to do with them. Much shooting of guns happens in the Shooting phase, but all that happens is the final Marksman goes down (shot by the three track Platoon of Abrams, since I don't have much chance of penetrating the Challengers from the front) and one of the two remaining Challengers is Bailed from Side Armor shots from the two Abrams Platoon.
 |
| Get on that Objective! |
 |
| HQ moving up. |
 |
| M901s and Bradleys moving up. |
 |
| M109s moving up. |
 |
| And then the Shooting happens. |
TURN SI... I MEAN FIVE - Uriah is sweating at this point. To be honest, so was I, Challengers are tough tanks, and it looks like it's going to come down to knife fighting practically on top of the Objective while my support Units crawl across the table, dodging minefield after minefield, to get to the other Objective, all while trying to avoid getting shot by the Lynx or the last Harrier. Uriah Remounts the Bailed Challenger! He then Fails to Remount the Bailed Chieftain, and then fails Morale, it's off the table! At this point, we think he has to make a Formation Morale check even though that should have happened last Turn. He fails Formation Morale, the Brits are in full retreat! We both start breathing again, he with remorse, me with relief, and neither of us suffered a heart attack.
 |
| And in the end... |
LESSONS LEARNED - Man, woman, and child, what a rollercoaster ride that was! Yes, we played high points, but with the force compositions we both played, the game went fast, three hours at the most, and really, it was closer to just two hours as we did a lot of BS'ing and joking around before we got the game truly underway. The extra table space was excellent, we both sprawled out and really enjoyed the extra maneuver room. Now I want to play a game on there with a large WarPact force with tons of vehicles and infantry, try a classic long side to long side battle, but we'll have to make sure we have the time to get everything done.
I think the biggest takeaways from the game was that neither of us did really poorly in our tactical decisions, we just really messed up on remembering all the rules. Bad luck with the dice were the biggest troubles either of us had, as there were entire Turns where one of us just couldn't manage to hit, Bail, or Destroy anything, or couldn't make an average Armor Save to save our souls. I also can't remember a TY game that I've had so few Units lost, even in my winning games - yes, I lost plenty of individual vehicles, but I only lost one Unit, my VADS way back in Turn Two. I don't think that was anything on my part other than luck, as I was throwing everything into combat pretty recklessly.
I swear it says somewhere in the rule book that Bailed vehicles don't count towards Unit Morale, and if your last vehicle in a Unit is Bailed and doesn't Remount, it counts as Destroyed and that Unit is done. I couldn't find it in the few moments I had at the game, and haven't had much time since then and now (as I type this) to dig deeper. I need to rewatch the TY Tutorials vids with my rulebook to hand to catch any changes between original TY and the latest version of the rules. I don't know, maybe we need to start over and play some very small games, maybe run through the original rules' intro scenarios (which are fantastic, if you've never played before, and ease you into the different Teams really well) with our third member reading the rule book out loud at each step so we can all really get the rules down. Who am I kidding, my brain is mush from too many years in the Army Guard and whacking my friends with a stick and getting likewise whalloped in return, and I have too many game rules in my head as is, as I'm also the Dungeon Master/Game Master for a D&D 5e game and a Cyberpunk Red game, and trying to get a Savage Worlds game with multiple settings up and running, too, three very different and unique game systems. I will not impugn Uriah's mental faculties, but simply state my idiocy must be virulent and communicable and he is hanging around me too much.
Yes, Uriah should have done more with his M109 artillery, Marksmen, and Tracked Rapiers, and I should have done more with my M901 ITVs and my A10 Warthogs. I should have attempted to use the Minelets from my M109s, maybe used them to deter the Challengers from Reserve instead of smoke, but then they could have shot at me over the Minefield at a higher ROF instead of being forced to move and shoot at a lower ROF. I don't know, I pushed the attack (admittedly, which is the point of Escape playing as the Attacker... which I just figured out, the Attacker is trying to escape, hence why the Defender's Reserves come in from behind the Attacker’s Deployment... told you my brain has been slow this week) and boxed Uriah in, there wasn't a lot of opportunity to use the Minelets as they would have just blocked my advance. And I didn't give Uriah a lot of targets for his AA pieces, as my A10s arrived only once, just outside the range of his Rapiers, and my softer vehicles were well behind my Abrams and out of reach of his Marksmen. Neither of us got to do much with my VADS or his Harriers, they essentially nullified each other out of the fight. The Harrier is a fantastic weapon for the British player, with a lower Strike Aircraft number than practically every other airplane in the game. I may have to add some to my US force in the future, the Marines won't mind if I borrow some from them. If anything, I could have traded in the M901 ITVs, and maybe half of my M109s and the Minelets, for 12 points that I could have turned into Apaches or more A10s/Harriers. I'll have to think more on this list. Uriah didn't say much about changing his own list, and I think it was pretty solid. About the only change was the AA selections, maybe down with one less Marksmen, or just get rid of the Tracked Rapiers entirely, though those were too effective at keeping my A10s at the far end of the board, so I'm torn between which way I'd lean there. Oh, I know one thing we definitely need to change - I need to acquire a very large die, like these 55mm d20s, so we can keep track of what Turn it is when Brandon can't make it. Uriah and I need some remedial counting lessons, apparently.
There you have it, folks, another month, another Battle Report in the books. Hope you enjoyed it, hope you learned something from it, and hope to see you back here again next month for that BatRep. Go out and roll some dice with your friends until then, it's fun whether you're winning or losing.