Well, would you look at that? Another month, another Team Yankee in 6mm scale battle report (BatRep). If you are just joining us, I play a wargame by the name of World War 3: Team Yankee, which is normally played in 15mm scale, but our little club plays it in a smaller 6mm scale. We get together once a month, throw down over at least one game, and try to improve each other's tactics and strategies. These BatReps are what I observed during the game, and what my friends and I discussed both during and after the games. This month we see a British Medium Recce Squadron take on Polish BMP Mech Infantry in the Encounter mission. Can the Brits overcome the horde of BMPs and infantry stands? Can the Poles kill enough "cockroaches" ( our group's nickname for the Scorpion and Scimitar vehicles) to make it through to the Objective? Let's get started with the pretty pictures and find out.
We set the limit at 75 points, and made sure to double-check everyone's lists against the online Forces list builder. Uriah playing his usual Brits brought 74 points to the table in a Medium Recce Squadron - standard 2 Spartan command element, two 4-track Scorpion troops, a 4-track Scimitar troop, and two Strikers to round out the formation; and from Divisional support, a 4 tube M109 battery with a FV432 FOO, three Chieftain Marksmen, two TOW Lynx helos, and three Challengers to strike fear into all and sundry. On the other side of the table, Brandon pulled out exactly 75 points of Poles in the form of BMP mech infantry - a BMP-1 and command rifle team for the lead element, a BMP-2 company (9 BMP-2s, 7 stands of infantry, 6 stands of RPG-7 troops, 2 stands of PKM teams, plus an extra BMP-2 and an SA-7 MANPAD team), a BMP-1 company (same as the BMP-2 company, except with BMP-1s), six T-72Ms, a 2 vehicle BRDM-2 scout element, and four ZSU-23-4 Shilka SPAAGs; from Divisional Support, another 2 vehicle BRDM-2 scout element, and a flight of six SU-22 Fitters. I thought both lists were competitive and about the only changes I would have made were minor (Abbots instead of M109s to get more tubes, maybe even 2 Units of arty instead of just the one so you could split fires; and for WarPact, I greatly prefer BMPs as your scouting element instead of BRDMs, but then you're dealing with one less vehicle and 1 Unit instead of 2), and I think both of my fellows fought their Forces well.
NATO and WarPact both chose Maneuver (I'm sorry, I live in the United States of America, and we don't spell that "manoeuvre", even the spellcheck in Blogger is highlighting it as questionable) and the roll off resulted in Encounter. On the roll off to see who was Attacker for the Deployment phase, Brandon's Poles won, and he chose to attack in Daylight so they didn't have to mess with the night vision rules (and I think the Poles would be on the losing end of that exchange, wise decision there). Deployments were pretty standard, and the group had a spirited discussion of the upsides and downsides of placing Objectives as far away from each other (upside, your opponent is more spread out; downside, you have to split your own forces or concentrate on attacking just one Objective) or closer together (upside, you can make your attack in one direction and then go after the other Objective in case one appears to be too well defended, and downside is your opponent doesn't have to spread out too far to cover both Objectives), and we ended on that you want a good balance between too close and too far away. You also have to take into account the Mission - last month's game where the Mission only called for the Attacker to have Objectives and the Defender to survive until Turn 8 to win, that is better to place the Objectives as far apart as possible, spread out the Defenders as much as you can, and then focus all of your Units into taking one and only one of the Objectives. But this month's Mission, where both sides have Objectives they can take to win the game, you want the Objectives to be a bit closer so your attacking Units can support each other between the two Objectives.
The only other thing I have to say about the Deployments is, if I was playing WarPact instead of Brandon, I would have probably juggled my Reserves differently (NATO had the Challengers, since they were 33 points by themselves, and WarPact picked the T-72Ms and the BMP-1 motor rifle company for their Reserves), trying to keep both motor rifle companies on the board for Deployment, as well as set up more for a defensive posture on both NATO Objectives, with Units Deployed to the inside of both Objectives for better mutual support, and worried about threatening Objectives across the table later in the game after Reserves showed up. Infantry backed up by BMPs are pretty decent in the offense, though, so I think what I would have done is more down to personal preference than it is sound tactics and winning strategies.
 |
| Drum roll please |
 |
| Double Maneuver! |
 |
| Looks like Encounter |
 |
| Encounter rules |
 |
| The mighty British Force |
 |
| The Polish Horde |
 |
| The field of battle |
 |
| From another angle |
 |
| WarPact to the right, Brits to the left across the table. |
 |
| A lone NATO Objective and the Units poised to swing towards it. |
 |
| NATO artillery and AA looking to cover as much of the board, with WarPact AA mirroring and defending the central NATO Objective |
 |
| A veritable horde of BMP-2s awaiting the order to advance |
 |
| British command Spartans and Strikers guarding the far Objective |
 |
| It's lonely out on the NATO left/WarPact right flank |
 |
| The view back across the table |
TURN ONE - Rolling again to see who is Attacker and who is Defender, Uriah's Brits win the roll off and immediately leap to the attack. The two troops of Scorpions on the British right Dash most of the way across the table, almost far enough to get to the Objective on that flank, but not quite. In the center of the British lines, the Scimitars, Marksmen, and M109 adjust position to either fire on WarPact Units facing them or better cover the dash for the Objective on WarPact's left. In Shooting Phase, NATO manages to remove half of a BRDM scout element and one BMP-2 and a stand of infantry. Yes, NATO is counted as having moved per Meeting Engagement, so the M109s did Direct Fire on the BMP-2s as they were not allowed to use their Artillery Bombardment. Not a resounding round of combat, but you could definitely hear the gauntlet hitting the ground.
On the WarPact side of the Turn, the battered BRDM scout element fails it's Remount check and then immediately runs off the table due to Morale. However, Brandon managed to roll his Fitters onto the board and they settled in facing down the Scorpions heading towards an Objective. The Shilkas Dash towards the Objective to start dealing with the Scorpions as well. The other BRDM scouts, having successfully Spearheaded the BMP-2 motor rifle company well forward, fall back to cover the other Objective. The BMP-2s push across the mid-field, heading towards the Objective recently abandoned by the British Scorpions. In Shooting, the BMP-2s manage to Destroy one and Bail two of the M109s, leaving that Unit perilously close to having to do Morale checks, and the BMP-2s also manage to Bail both Strikers on the far Objective. In Defensive AA fire, three of the newly arrived Fitters fall from the sky on fire, but the remaining planes streak in and land a Salvo on the Scorpions, Bailing one track. Brandon was hoping for more out of that Salvo, but sometimes the dice hate us all.
 |
| We substituted AMX-10Ps for Scimitars, and West German Wiesels for Scorpions |
 |
| Brits maneuvering to fire |
 |
| Spartans and Strikers adjust to better cover the Objective |
 |
| Burning BRDM. The Bailed fails its Remount and heads for the hinterlands |
 |
| M109s bag themselves a BMP-2 |
 |
| Motor Rifle Company under attack |
 |
| Here come the strike aircraft |
 |
| Shilkas moving to the engagement |
 |
| BMP-2s hustling towards the fight |
 |
| Yup, covers about all of them |
 |
| Marksmen are deadly to aircraft |
 |
| M109s take a beating |
 |
| As do the Strikers |
TURN TWO - The Brits lose their Strikers, fail to Remount any of the Bailed M109s, but keep them in Morale, and manage to bring their Lynx strike helos onto the table. Abandoning most attempts at Shooting, most Units Dash forward, threatening both Objectives. There is a little bit of firing, from the Lynx helos and from the last remaining M109, managing to Bail one BMP-2.
Brandon Remounts the one Bailed BMP-2 and Blitzes both that Unit and the Shilkas, the BMPs to get them even further down the table to start threatening the Objective on NATO's right flank, and the Shilkas to stop the Scorpions from capturing that Objective. Rolls for the Fitters but fails to get the required result on the die. The loan BRDM scout element peaks out to get some shots at the charging Scimitars, and after failing to do much of anything to them, Shoot 'n' Scoot back into cover. The BMP-2s start shooting at everybody on the board, Destroying 2 and Bailing 1 Scorpion on the far side of the table; Destroying both Lynx helos; and removing two more M109s from the game, leaving only one Bailed on the board.
 |
| Turn Two |
 |
| Lynx Helos lining up for the shot |
 |
| M109s still on the board |
 |
| Scimitars Dash forward, threatening the near Objective |
 |
| Scorpions motor forward towards the far Objective |
 |
| The Unit of Scorpions on the left Shoot 'n' Scoot towards the Shilkas, into cover |
 |
| Bailed BMP and stand of SA7 MANPADs from that track |
 |
| Shilkas Blitz to stop the Scorpions from capturing the Objective |
 |
| Blitzing BMPs |
 |
| Scorpions catch fire from the BMPs |
 |
| BRDMs Shoot 'n' Scoot back into cover |
 |
| More Destroyed M109s |
 |
| BMPs firing at the helos |
 |
| Burning Lynx helos |
TURN THREE - Uriah fails to Remount the last M109 and it flees from the field (boo!), but does manage to Remount the Bailed Scorpion (yay!) and bring his Challengers in from Reserve (yay!). Unfortunately, because the Shilkas are also within 2 inches of the Objective (we halve all non-weapon range distances for the smaller scale), he can't just end his Turn and win, gotta pry them off the Objective and go for the capture next Turn. The Scorpions move further to bring the heaviest weight of fire onto the Shilkas as possible - if he can remove the Shilkas from around the Objective and survive through WarPact's Shooting this Turn to keep a Scorpion within 2 inches of the Objective, he wins at the beginning of Turn Four as there are no WarPact Units close enough to Dash in and contest the Objective. The Challengers press forward, threatening the BMP-2s to their front. The Scimitars realign themselves, fire at the BDRMs guarding the other Objective, and then Shoot 'n' Scoot. In Shooting phase, the Challengers only manage to connect with one of the BMP-2s, knocking it out handily (Armor Save vs a 125mm rifle? not from a BMP-2 you're not!), the Scimitars Destroy one and Bail the other BDRM scout, and the Scorpions roll the big numbers and Destroy all four Shilkas in a flurry of destruction. Uriah then failed all of his Skill checks and could not Shoot 'n' Scoot either of the Scorpion troops, which would have just doubled down on the number of tracks within 2 inches of the Objective.
Brandon is now sweating bullets - he doesn't have anything else in position to contest the capture of that Objective, at least not on the ground. If he can get his strike aircraft in, he only has to Destroy or Bail two of the Scorpions, because that is all that is within 2 inches of the Objective. But first, Remounts, which he does get the last surviving BDRM back up and running, and it passes Morale and stays on the board. Then strike aircraft - he gets them onto the table! He has a chance now of surviving through Turn Four. To give his Fitters the best chance they can of taking out the necessary Scorpions, he continues to drive his BMP-2s across the table. The cannons on the BMP-2s can't do anything to the Challengers to their front-right, but they can tear up the Marksmen, and if he can Destroy or Bail the entire Marksmen Unit, they can't shoot at his Fitters, giving them the time to "deliver the package". The last remaining BDRM shoots at the Scimitars with its 14.5mm MG - one Bailed Scimitar. The trailing BMP-2s that can see the Scimitars shoot at them. Why? If he survives this Turn, he is just future proofing that Objective from also being overrun. He Bails another Scimitar and Destroys the last two outright, meaning that Unit has to get at least one Remount next Turn and possibly a Morale as well if only one track Remounts. Then the BMP-2s shoot up the Marksmen, Bailing all three tracks. Yes, this is not as good as having all or some Destroyed, but being Bailed now means they won't be able to Defensive Fire on the Fitters. Speaking of, it is now the Fitters' turn, and they roll to Range In, needing a 4+ - they roll a 3 (no!), they roll a 2 (NO!), and on the last roll, they roll a 1 (NNNNOOOO!!!!), failing to Range In and not being able to fire their rockets, for all intents and purposes, ending the game.
 |
| Turn Three |
 |
| Challengers arrive and drive forward, menacing the BMPs to their front |
 |
| The Scorpions regroup and take on the Shilkas |
 |
| The Scimitars consolidate and take on the BDRMs |
 |
| That is a dead BMP-2 |
 |
| Woo-hoo! The Shilkas all burn! |
 |
| Burning BDRMS, and the Scimitars Shoot 'n' Scoot |
 |
| The BMP-2s drive forward |
 |
| "I need to get at least 2" |
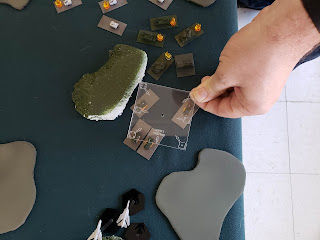 |
| That template does cover the whole Unit |
 |
| The BDRM Remounts, and Scimitars are burning and Bailed in response |
 |
| The Marksmen all catch it from the rear |
 |
| The Fitters fly over their target |
 |
| Disappointed, Brandon tells his dice "your number is one!" |
TURN FOUR - As I said, the game is over. Uriah starts his Turn with Teams within 2 inches of the Objective, and all he has to do is end his Turn and he wins, so that is what he does.
 |
| Turn Four |
 |
| Brandon, left, congratulating Uriah on his win |
And that was the end of the game. As I said before, we had some good discussions on tactics and what we would have changed during the game, and what we would try to do to counter this or that. I've already related most of those discussions, so I will try not to rehash here. I think this was a good game where both competitors played to their strengths and to their opponent's weaknesses. The dice were very swingy for both players, favoring neither of them, which is how our math rocks/random number generators should be. I have roads and buildings, but I do need to create some rivers for our little collection of terrain bits, as well as finish out the rest of the pieces, but with the new space we are playing in, there is some other carpentry the group has to finish first, namely some bigger table toppers to give us bigger playing areas. I will finish this BatRep there, then. Go out and roll some dice with your friends and play some games. See you next month!


