Another month, another tiny tank throw down for our World War III: Team Yankee in 6mm Escalation League. Oddly enough, this game was very similar to one that happened back in June, this one in fact. Uriah brought his Chieftain Armoured Troop, Brandon brought out his Polish T-55 horde, and they competed using the Encounter mission. This time, they had 75 points each of their army of choice, and we had a noticeably wider battlefield due to having a table with different dimensions and more terrain on hand. We did not get to see the finish, as one of our players had to duck out early, but they'd got pretty close to finishing at the end, and everyone seemed to enjoy themselves. Before I drone on like I know what I am typing about and try to wring a lesson learned out of a game I merely watched rather than participated in directly, I will let one of the players sum up their view of the game. Brandon summarized the game this way (his own words from our Facebook group):
I learned A T-55 hoard isn't as powerful if two of the three companies are forced to be in delayed reserves. All in all, I think both game plans were sound but in hind sight I believe I made one mistake that may have made or broken things early. Instead of deployment of my one on table T-55 company in the woods, I should have placed them more in the open. Having first turn, I should have went balls to the wall toward Uriah's Cheiftan command element setting on the objective. Many would have died, but I believe I could have swarmed them and turned the battle.
Instead I got a little defensive and employed way too many assets in chasing down those Scorpions. The Shilkas and BMPs were enough to counter their push.
I thought the game was very close, myself. I think that Uriah could have pushed for one of the Objectives earlier and he possibly could have won around Turn Three or Four, but he did not choose to do that. I will point out where I thought he could have pushed and maybe ended the game early, but until then, we will get started. Concerning what Brandon said of his performance, and looking back on it, I believe he judged his performance correctly, but where he felt he could only put two of his tank companies into Reserves, he could have just put one in (17 points) and then his Shilkas, Carnations, OP (if the Carnations are not on the table, why bother with the OP?), and Spandrels (13 points) also into Reserves, he would have started the game with two tank companies, the HQ, and two BMP scout elements Deploying, it may have changed his tactics a bit.
Just like last time, after we got a lovely, large table filled with terrain, the Brits picked Maneuver, and the Poles picked Attack, and the roll brought us to Encounter. Force composition was: the British Death or Glory Boys brought eight Chieftains (two troops of three, and a command element of two), four Scorpions for Recce, four M109s for artillery, a FV432 forward observer, three Marksmen AA tracks, and three Swingfires; the Poles brought the T-55AM2 horde, with 31(!) T-55s (3 companies of 10, with a lone HQ track), two BMP-1 scout elements of four tracks apiece, four Shilkas for anti-air/-infantry/-lightly armored vehicle work, three Carnations with a BMP-1 OP, and three Spandrels to round out the mix. Still no infantry, and Uriah took out the Lynx helos that did not do a whole lot in the last game (though we found in the book that the AA MGs on vehicles only have a ROF 1 when shooting at aircraft, so they may have lived longer this game). Also, Uriah has been talking about switching over to Abbots, which do cost less and are inherent to the Formation instead of in Divisional Support, but that comes at the cost of lower AT and higher Firepower rolls. Plus, our favorite vendor, GHQ, and the other 6mm mini maker on the North American continent, Legions IV Hire, do not make/carry any Abbot miniatures, so he would have to go to Heroics & Ros in the UK, and shipping internationally is very slow and unreliable at the moment.
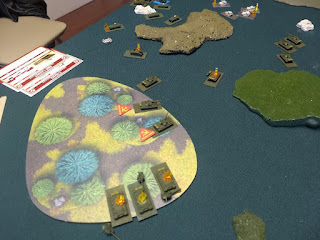
Both deployments were pretty conservative, except Brandon left the Objective on his left flank fairly exposed. He did put his Shilkas nearby, but they were not in the traditional place of already on top of the Objective, they were closer to the center and in more of an overwatch position. I do not know if he did this on purpose to entice Uriah into attacking that Objective and ignoring the other one, but that is what happened. Scattered Delayed Reserves for both sides, so the Polish Force leaves two whole companies of T-55s waiting in the wings, and the Brits have a troop of Chieftains, the Marksmen, and the Swingfires all off board at the start. On to the pretty pictures!
 |
| Draw some cards, roll a die, and get the same result as last time. |
 |
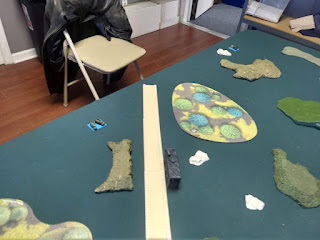
| The field of battle. The new hills and tree pieces are just getting started and will become prettier as I have more time to work on them. |
 |
| The field from the other side. This is not much space for a 15mm game, but huge for our 6mm needs. |
 |
| The British Force. |
 |
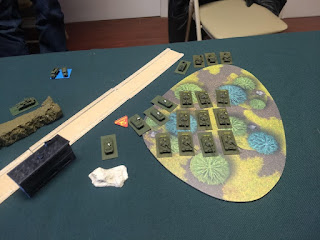
| The Polish Force. |
 |
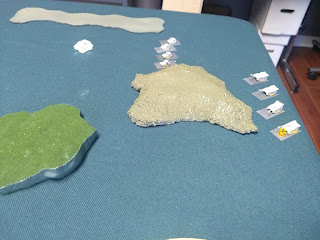
| The WarPact Objectives. |
 |
| The NATO Objectives. |
 |
| BMP scouts using Spearhead to get Spandrels across the board. |
 |
| The staredown between Chieftains and ATGM troops. |
 |
| WarPact commander (by his lonesome), artillery observer BMP in the trees, and the Carnation artillery. |
 |
| Another BMP scout section using Spearhead to get T-55s into the trees, and Shilkas behind the trees. Yes, one of the BMPs Bogged at the edge of the trees. This particular set of trees will become a tracked vehicle black hole for the rest of the game. |
 |
| The very lonely left side (WarPact's left) NATO Objective. |
 |
| Directly across from that lonely Objective, we see the Scorpion Recce Troop and M109 artillery battery. |
 |
| British command element babysitting that Objective (NATO right) with the artillery observer in the trees to their right. |
 |
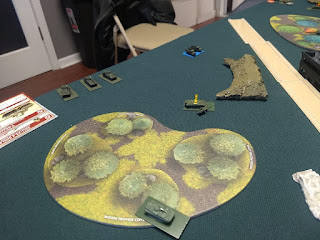
| Chieftains sitting on the other Objective (NATO left). |
Round One - During all the rolling (you roll twice to see who is Attacker in the Encounter mission, once when Deploying Units, and then again to see who actually goes first) Brandon and his Polish Force ended up being Attacker both times. Going first, the Poles moved the tank company on the left towards the edge of the trees (mostly), the Shilkas a little bit left to cover the gap, and withdrew the BMP scouts (mostly). Having only the M109s visible, the Poles shot at them and destroyed one.
Over to the Brits, they pushed the Scorpions almost the entire width of the field, coming very close to the Objective on the WarPact left. The British command opened fire on the T-55s in the trees, destroying three. The artillery observer manages to spot the Shilkas (there was some confusion on whether the OP could see through the trees or not, having forgotten to Blitz and move him into a position where he could, for sure, see the Shilkas and T-55s, so they "high-lowed" the question, and Uriah won the roll), Ranged In on the first roll, and the M109s destroy one Shilka and Bail two others. This game was the most use I have seen out of anyone's artillery in our group (including my own arty), and it made the game more interesting.
 |
| T-55s (mostly) moving to the edge of the trees, Shilkas moving up, and BMPs withdrawing. Note the Bogged T-55 and BMP. |
 |
| BMPs considering a dash down the road at the British command element. |
 |
| Burning M109. |
 |
| The Scorpions advance (quickly!) down the table towards the Objective. |
 |
| Tasty targets. The T-55s did not fire at these Chieftains, as they do not even have a chance to Bail them from the front. Their (the T-55s) only hope is to surround and get side/rear shots. |
 |
| Three burning T-55s from four shots. |
 |
| Successful artillery barrage. |
Round Two - The WarPact observer comes to the edge of the trees to get some spots in, and the Polish commander also moves out of cover. Realizing the game could be over next Round (to capture an Objective, you have to start your turn with a Unit inside of four inches - distance halved for the scale we are playing - and end it with no enemy Units inside that same four inches), the Polish troops mobilize and begin rushing towards the Objective on their left. T-55s attempt to scramble out of the trees (two make it, and the other five all Bog), the Bailed Shilkas pass their Remount and head out from under the Ranged In marker and towards the Objective, and the BMP scout section un-Bogs and heads that way as well. WarPact Carnations Range In on the British command tracks, but no destroys, no Bails. The Shilkas fire at the Scorpions they can see and destroy one. The T-55s that made it out of the trees try shooting the Scorpions as well, but with all of the Scorpions' bonuses (cover, Gone to Ground, Slow Firing), the T-55s manage to hit nothing.
In response to all of that, the British command element adjusts position out from under the artillery barrage, and brew up one of the T-55s shooting at the Scorpions. The Scorpions, instead of pressing on to the Objective to begin capturing it, fall back just a bit to get out of the Shilkas' line of fire.
Armchair General time - I would have driven those Scorpions right onto the Objective, and probably have doubled down on my gamble by moving the M109s directly behind them at Tactical Dash from Round One to try Direct Firing at anyone coming close to the Scorpions. I may have even used Spearhead with the Scorpions and Deployed the M109s inside their bubble (behind that long line of trees you paintball players may have subconsciously been calling a "snake" this whole time - both that set of trees and the set of hills at the complete opposite side of the table I built with a paintball snake in mind), totally foreshadowing my intentions in Deployment, and making him react to me instead of the other way around. But that is me and what I would have done. I even suggested it to Uriah to move his Scorpions up at this point without the M109s in Direct Fire support, but he said no, he wanted to play it more conservatively. Was I right and Uriah wrong? For this game, no, his conservative play worked out a lot better than I expected. As Brandon said earlier, his Units were out of position and he still had to react to Uriah's push anyway.
 |
| Artillery observer and command track peeking out to get in on the action. |
 |
| The Polish Bog train and the Trees of Doom... or Quicksand, or something. |
 |
| "I say, chaps, I believe we are getting shelled." |
 |
| Scorpions under fire from two directions. |
 |
| Chieftains move out from under barrage to fire, but still cover their Objective. |
 |
| T-55s catching fire from the rear. |
 |
| Scorpions adjusting back, away from the Shilkas. |
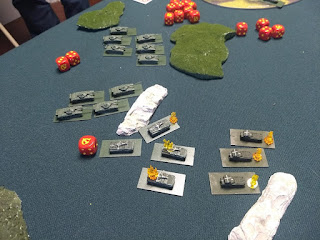
Round Three - With Scattered Delayed Reserves, this is the first opportunity for either side to get a Unit out of Reserves, and a Polish T-55 tank company rolls onto the board (WarPact right per the Scattered roll) and heads down the outside of the "snake" hills. The Shilkas move onto the Objective, facing down the Scorpions, the BMPs move to backstop them, and more T-55s trickle out of the trees, leaving two Bogged and one with not enough movement still in the trees. The Carnations Range In on the British OP, accomplishing not much, but still trying for the lighter armored FV432 instead of the mobile bunkers called Chieftains. Firing both Shilkas and T-55s, the Poles manage to destroy two more Scorpions, leaving one lone Scorpion near that flank. Panic time? Not yet, that Scorpion sticks around for another Round or two, managing to tie up three Polish Units until Round Five. Sorry, SPOILERS!!
The Brits reply, moving the Chieftain troop on the Objective to their left, over to get in position for the coming T-55 horde, and stop to start shooting at the BMPs and Spandrels attempting to hide a few hills over. The remaining Scorpion passes his first Unit Morale and moves closer to the Objective, out of the line of fire of the T-55s. Two BMPs by the Spandrel Unit burst into flames due to Chieftain fire, the British M109 Ranges In on the other BMP Unit by the WarPact left Objective, destroying one and Bailing another (like I said, the most effect I have seen from artillery in all the games we have played to date), and the lone Scorpion opens up on the Shilkas to his front, destroying two! The British command Chieftains open up on their opposite number and annihilate the lone T-55 (four 120mm shots, even into Frontal Armor? brutal), leaving the Poles without a Commander as there were no Units within range to transfer into. Oh, and the Brits fail to bring any Units from Reserve in this Round.
 |
| With the "Flight of the Valkyries" playing in the background, the Commander yells (in Polish) "CHARGE!" Or, from Google Translate, "POSTĘP!" (I hope that is right and not culturally insensitive) |
 |
| Poles moving to invest and protect the Objective. |
 |
| Artillery observer catching some artillery fire, now that is ironic. |
 |
| Scorpions burning. |
 |
| Chieftains moving to cover and take some shots of their own. |
 |
| "I believe he is calling in artillery on us, shall we deal with him, chaps?" "Good idea, old bean!" Oh, those wacky Brits and their dry humor. |
 |
| I still cannot get over how long this lone Scorpion stayed in the fight. |
 |
| BMP-1s catching fire from concentrated 120mm cannon fire. |
 |
| Yep, the lone Scorpion destroys two Shilkas by itself, while the three remaining M109s destroy a BMP and Bail another. |
 |
| The Polish Force CO perishes, but since everything except one Unit of BMP scouts and the Spandrels is inherent to the Formation, they are nowhere near needing to do Formation Morale Checks. |
Round Four - Two dice for Reserves, and the Poles manage to bring their last Unit in from Reserves, another company of T-55s, and roll for the right side of the table (their right) once again. Both companies of T-55s on that side start maneuvering to swarm the Objective on that side of the battlefield. The Spandrels and remaining BMPs on that flank also start maneuvering (successful Blitz move) to go after the Brits. The BMP artillery observer attempts to leave their woods to go spot something, but fail their Cross Check and Bog. The Carnations decide it is just easier if they do it themselves, and maneuver to start putting some Direct Fire into the British. On the other side of the battle, of the three T-55s still in the trees, only one manages to pass their Cross Check, leaving two still Bogged, and both the T-55s and BMPs maneuver towards the remaining Scorpion. The lone Shilka fails Morale and heads back towards Poland. The Spandrels and surviving BMPs fail to get through the tough Front Armor of the Chieftains, but you miss every shot you do not take. The Carnations manage to Bail one of the Chieftains in the British command element, while the concentrated fire of BMPs and T-55s manage to Bail the last remaining Scorpion.
On the British turn, they finally get one call up from Reserves, a troop of Chieftains, and the Scattered roll puts them on the British left, right in front of a charging full company of T-55s. The Chieftains on the Objective on the British left adjust to better cover the coming T-55 company (and remaining BMPs and Spandrels), while the M109s shift over to start doing some Direct Firing of their own. The last standing Scorpion fails its Remount roll, which means it automatically fails Morale, and finally leaves the battle field. That one little scout vehicle tied down three whole Units, destroying one Unit personally, and tied up the entire WarPact left flank for four Rounds. Scorpion Recce Units are good investments for British players. The British command element, having Remounted their Bailed track, fire at the Carnations, destroying one and Bailing another. The Chieftains investing the Objective on their left, wipe out the Spandrels to a vehicle for their temerity of coming out to fire, and also pop one of the BMPs that came out of cover. The newly arrived Chieftains fire all cannons and manage to destroy two T-55s and Bail another out of the company to their immediate front.
 |
| That is a lot of T-55AM2 tanks. |
 |
| Cross Checks, the bane of the Polish in this match. Carnations have moved up to do some Direct Firing of their own. |
 |
| What did I say about the Poles and Bogging in this game? |
 |
| That is a lot of firepower focusing on just one, little Scorpion. |
 |
| Bailed Chieftain. |
 |
| All that firepower, just for one Bailed track. |
 |
| Reserves arrive onto the field. |
 |
| "Target front!" |
 |
| Here come the big guns. |
 |
| Finally, the Scorpions are done. |
 |
| The Carnations catch return fire. |
 |
| Lightly armored vehicles zero; 120mm-armed Chieftains, six. |
 |
| It looks bad, but this company still can lose another six tanks before they have to make a Morale Check. |
Round Five - The T-55s on the far right of the Polish formation, the ones that had lost two comrades (they manage to Remount the Bailed tank, opening up that side of the table for other tanks to maneuver through), abandon all pretenses and Blitz, then move non-Tactically to surround the Chieftains that had just arrived last Round. Yes, they cannot fire, but firing into the Front Armor of those Chieftains is a lose-lose for them as they cannot penetrate FA, and they need to get Side Armor shots as soon as possible. Likewise, the other newly arrived T-55 company also charges straight towards another troop of Chieftains, this one near the Objective on the NATO left, but instead of Blitzing then moving, they fire (to no effect) and then Shoot 'n' Scoot to get into cover... somewhat. The last BMP of the scout element near the Spandrels fails its Morale Check and also heads towards Poland. The Bailed Carnation Remounts and they return fire at the British command element. The T-55s and BMPs on the WarPact left race towards the M109s just now peeking around the hills they have been behind most of this match, smelling blood in the water, and there are still two T-55s Bogged down in the trees they started this game in. The WarPact BMP OP finally un-Bogs, but just pulls back into the trees as there is no artillery that is not Direct Firing, so no point in perishing by staying outside of Concealment. The Carnations manage to destroy one of the British command Chieftains and the T-55s on the WarPact left destroy two M109s.
Answering the call, the Brits bring both of their remaining Units (the Marksmen and the Swingfires) out of Reserves, and both come onto the table on the NATO left. Of course, Units coming onto the table have Moved, so the Swingfires cannot fire this Round, but the Marksmen can. The last M109 fails its Morale Check and heads back to the rally point. The remaining Chieftain in the command section fires at and destroys another Carnation, while the Chieftains around the other Objective fire at and destroy two, Bail two of the T-55s bearing down on them. Meanwhile, the Marksmen and Chieftains in the busy corner of the battlefield only manage to Bail four of the T-55s surrounding the Chieftains there.
 |
| This is really what everyone saw coming. |
 |
| Charge, shoot ineffectively to get Shoot 'n' Scoot, and move (kind of) into cover. |
 |
| The T-55s and BMPs head for the M109s - Do Unto Others, Before They Do Unto You. |
 |
| Still Bogged in the trees. |
 |
| "We have shot, and so we scoot, and they cannot shoot us." |
 |
| A Chieftain succumbs to 152mm Direct Fire artillery. |
 |
| The M109 has a big, scary 155mm cannon, but no real armor to speak of. |
 |
| More British Reserves arrive in this corner. All Reserves this game came onto the board on this side of the field. |
 |
| The last M109 "nopes" out. |
 |
| Likewise, the Carnation has a good cannon, but no real armor. |
 |
| "We did not scoot into cover far enough, did we, comrade?" "No, no we did not." |
 |
| Uriah was hoping for more carnage here, and I think both Brandon and I were expecting it. |
Round Six - This is the last Round played, as Uriah had to leave early. The last Carnation, which I did not get a picture of, fails Morale and heads back to the rear. The T-55s on the WarPact far right manage to Remount all but one track, and pile in for as many side shots as they can manage. The next T-55 company over Remount one tank and also abandon Tactical speed for Terrain Dash to get into doing side shots next Round. The last T-55 company, having finally passed their Cross Checks to get out of the woods, consolidate and head back towards the Objective protected by the British command element, also moving Terrain Dash and not getting to fire this Round. The last remaining BMPs stayed where they were at (Armchair General note: I would have been moving them in behind the T-55s to get off Sagger shots next Round or the Round after). The T-55s surrounding the Chieftains on the NATO far left manage to finish off the entire troop, the only shooting the Poles got in this Round, and it was very effective.
In response, the Brits wheel the Marksmen into the rear of that T-55 company, but do not manage to even Bail any of the T-55s. They are more successful elsewhere - the company of T-55s surrounding the other Chieftain troop at the NATO left Objective, loses five tanks to combined fire from the Chieftains they are surrounding and the Swingfires firing into their Rear Armor (there were six there, and then next picture there was only five, I am not sure what happened). The two T-55s that have spent the entire game until now Bogged at the edge of the trees die (well, one destroyed and one Bailed) to fire from the last Chieftain command vehicle.
 |
| The T-55s, Remounted, surround the Chieftains. |
 |
| Scramble! Scramble forward and surround! |
 |
| Finally out of the trees and heading back into the fight. |
 |
| BMPs hanging back. |
 |
| The T-55s manage to wipe out the entire Chieftain troop. |
 |
| The Marksmen swing to flank the remaining T-55s... |
 |
| ...and fail to even Bail one of the T-55s, out of 12 shots. |
 |
| All of the T-55s that swarmed these Chieftains perished, though we are still missing one from the last picture. I do not remember it being mistakenly moved from the last position and moved back, so I just think it got moved before I could take the picture as someone got excited. *shrug* In the end, it still affects nothing in the game. |
 |
| They finally got out of the trees, just in time to get shot. |
As stated before, this was the last Round, Uriah played through the end of that Round and then had to leave. Brandon rolled to see which of his vehicles would Remount (two out of three, not bad), and that is where they left the game. The one Bailed T-55 surrounding the now destroyed Chieftain troop failed their Remount, and the other two got back in, leaving one T-55 tank company with eight tracks (one Bailed), one T-55 tank company with one track (right at making a Morale Check, which we did not roll before tearing down), one T-55 tank company with five tracks, and a BMP scout element with three tracks, but on the far side of the board from the action. All of these Units are inherent to the Formation, so they are still losing three Units before making a Formation Morale Check. The Brits have a full Unit of Marksmen (Divisional Support), a full Unit of Swingfires (inherent to the Formation), a full troop of Chieftains, and a command element with just one tank left in it (HQ Unit, so does not have to do Morale Checks). And this is where we sit at, wondering where our combatants will go from here. Do the British hunker down and play the attrition game with the last of the T-55s? Do they Terrain Dash the Swingfires (the fastest of the support elements left) towards the uncovered Objective near the center of the WarPact Deployment zone, forcing the Poles to react and chase instead of going after their Objectives? How many Rounds will the lone remaining T-55 make Morale Checks before it eventually fails, or, to put it a different way, how many Rounds will that one tank be distracting the Brits? Will the BMPs on the far side of the table be able to cross enough distance to support the T-55s before they succumb to Chieftain cannon fire? And that is where I will leave it. I have Armchair General'd enough in this BatRep, and I honestly could not say who was going to win this battle. I will say that, as of the end of the game, the Brits had lost 38 points and the Poles had lost 41.5 points.
Hope everyone has a good Thanksgiving (if you reside in the States) and we will be playing this again in another couple of weeks.