Another month, another 6mm Team Yankee Escalation League Day. This time we find the British of Uriah combatting Brandon's Polish forces in Fighting Withdrawal, where the destroyed vehicles could fill your average small city junkyard with ease, and victory came after many Turns of struggle.
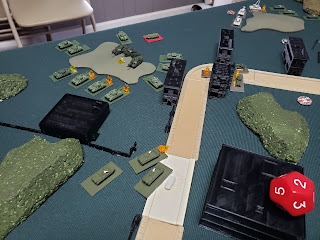
We had our usual board setup - lots of hills and trees, one big, zig-zaggy road with buildings and cars, a field of battle where there were not many long lines of sight, and most of the combat would end up being at knife fighting range. In choosing the mission, NATO goes for Defend, and WarPact goes Maneuver, angling for the unexpected. The roll results in Fighting Withdrawal which can either be helpful to low Unit count lists or hurtful, depending on the situation - as you start withdrawing Units at the beginning of your Turn on Turn Two, depending on if you have six or more Units on the field at the time, or take a Delay Counter this Turn. Next Turn, add your Units and Delay Counters together and if the equal or exceed six, remove a Unit or take another Counter. If you start with six or close to six Units, it is not many Turns before you are removing Units, either from the withdrawal rule, or they are just getting overwhelmed and Destroyed by weight of enemy numbers. I would love to run this Mission as the Defenders, using a mechanized infantry list. British or West German MILAN heavy lists would be awful to face, the WarPact horde of "how many stands of infantry are you Deploying?!" unending wave of bodies backed by decent IFVs is a nightmare for the Attacker, and even an American old-school M113 mech infantry Formation brings a lot of stationary firepower to the table that is surprising, much less a Bradley mech infantry with their decent IFVs. And that many Units in Fighting Withdrawal, yes, you are pulling Units off the board in Turn Two, but you have them to spare and enough redundancy you can pick and choose who has to go. With six or close to six Units, you walk a fine line between having enough Units on the field to meet your needs and having to Withdraw the last Unit standing before the end of Turn Eight and forfeiting the match mere moments away from victory.
 |
| We have terrain, and by God, we are going to use it! |
 |
| Yes, that is the entire British Force. |
 |
| The cards have been drawn... |
 |
| And here's your winner! |
As part of the Escalation League, we took another step forward and everyone brought 125 points to the table. Uriah upgraded his usual Chieftains to the mighty Challengers, bringing a two tank command element, two Troops with three tanks apiece, a three Marskmen AA element, four Scorpions, and three Swingfires. Fighting Withdrawal is nice in that there are no Reserves for either side, only one Ambushing Unit for the Defenders. For this, Uriah picked one of his Chieftain Troops. This is where I once again double check the lists and find a discrepancy - Uriah only brought 104 points to a 125 point match. This is impressive when you see how long he lasted in this match missing 19 points he could have added into the mix.
For his force, Brandon took the list from our last game, took out the Soviet T-62 support and threw in more Polish... everything. Not wanting to repeat his mistake last time - we joked amongst ourselves how big a cheater Brandon is (he is definitely not a cheater) and how mad everyone else was (neither of us were or are mad about it, it was an honest mistake) - Brandon brings exactly 125 points to the table. A T-55 (not T-55AM2, basic T-55s) battalion consisting of a T-55AM2 command tank (there is not enough difference between the two tanks to make an actual point difference, so they just give you a T-55AM2 for the command vehicle) and three 10-tank companies, plus four Gaskins, four BRDM scouts, six Carnations, and four Shilkas. He also added a T-72M Formation, one command track and two five-tank companies, along with three BMP scouts (having this many vehicles, bring in the Spearhead as much as possible to get those Units as close to the enemy as possible as soon as possible). Then from Divisional Support, three DANAs (these are so nasty that I am considering switching from the East Germans to either Poles or Czechs just to be able to field these, but there are other considerations to make as well), a BMP OP, a three track BMP scout platoon, three Spandrels, and six SU-22 Fitters. That is a lot of vehicles, but as we are about to find out, sometimes it is better to spend the points and bring the higher AT against the later generation MBTs like the Challengers.
 |
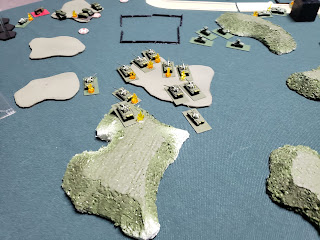
| The Polish horde, preparing to Deploy. |
 |
| British Ambushers await their grand entrance. |
 |
| I still love the detail you get from GHQ minis. |
With that out of the way, Deployment commenced. Defenders get one Minefield for every 25 points per side, and five Minefields covers a lot of ground, which Uriah used to good effect. Defender also gets to roll for time of day, if they so choose, and Uriah so chose, lucking out and getting Dawn. I agreed with his decision then, eking out every advantage in this kind of game (very few vehicles facing off against many vehicles for a minimum of eight Turns) is what you want to do, and the earlier generation WarPact vehicles are very inexpensive, but you do not get a lot of "creature comforts" as a result. Deployments for both sides was as expected - the British hang back in deep cover, good overwatch positions on both Objectives; and the WarPact Units use their multiple scout elements with Spearhead to get far forward, T-55s in front to act as ablative meat shields, T-72s trailing just behind them, and all of the support well back to do what they could for the battle.
 |
| Objective on British right being covered by Swingfires and Minefields. |
 |
| British command backing up the Swingfires. Sorry for the blurry pic. |
 |
| Challenger Troop minding Objective on British left. |
 |
| Marksmen and Scorpions at extreme British left. |
 |
| T-55s, scouts, DANAs, and OP on WarPact left. |
 |
| T-72s, Gaskins, and Spandrels, WarPact mid-left. |
 |
| T-55s and BMP scouts, WarPact mid-right. |
 |
| T-72s, Carnations, and Shilks, WarPact mid-right. |
 |
| T-55s and scouts, WarPact extreme right. |
TURN ONE - This goes about how we are all expecting it to go - WarPact Dashes forward with most of their Units, as it turns out they hardly have anything on the table that can pierce the Front Armor of the Challengers, so they need side shots, and the Brits hang back and start stacking bodies right, left, and center. Brandon starts suffering with T-55s in the woods, their 4+ Cross Check will be the bane of his very soul as some of these tanks will never leave them this Turn or in the next six Turns that are played. A couple of things I noticed - I think Uriah should have kept the Marksmen and Scorpions closer to the center, the Marksmen to cover more of the board, and the Scorpions to not hang them so far out on the edge of the Formation. Also, with the Swingfires (which immediately suffer one loss and one Bail that does not Remount, and then the Unit fails Morale and leaves) and other ATGM vehicles that have a Halted ROF of one, and Moving of none, I like to start them deeper in the woods, and then Blitz move up to the edge of the woods and fire. Next Turn, if they are still around, Fire and then Shoot 'n' Scoot back into cover. Rinse, repeat. On the other side of the table, and we talked about this after the game so all of us had forgotten it at this point, Brandon should have been using Cross Here commands to get his T-55s into/through/out of the woods. You do not realize how useful even a +1 bonus can be, but with a Cross Check of 4+ (or 50/50), moving to a 3+ (two-thirds success rate) is big. I might have also, as the WarPact player, thrown all my Units forward excepting the artillery, and especially use the AA vehicles as distractions and ablative meat shields. Our little gaming group does not really track wins and losses and Victory Points, so winning is always my goal, not winning and lessening the number of points I feed to my opponent. Yes, I would send in the BRDM scouts, and the two Units of AA as the Brits had no air assets this game, try to Dash to the Objectives as fast as possible. No way would Uriah let me win with such a tactic, but he might fail on the dice or go dumb before handing me the game, and if nothing else, it is forcing Uriah to pry those otherwise useless Units off the Objectives and ignore other Units, giving those more useful Units to keep Dashing and not engage at any range beyond point blank and in Side Armor.
 |
| Turn One. |
 |
| BMPs move up to shoot at Marksmen. |
 |
| One dead Marksman, one Bailed. |
 |
| T-55s already on top of the Challys defending the Objective NATO left. |
 |
| A lucky hit by T-72s Bail one of the command tracks. |
 |
| Swingfires take a beating. |
 |
| T-55s on WarPact left start Bogging. |
 |
| Not a lot going on here, just some minor shuffling. |
 |
| Again, minor shuffling. |
 |
| British turn, Ambushing Challys replace Swingfires and enact a devastating toll on the T-55s, with the help of the command element. |
 |
| Many burning tanks. |
 |
| The Chally troop on the other end of the table Blitz into a more defensible position, and kill more T-55s. |
 |
| The Scorpions run, but leave a fellow behind. |
 |
| Failed Remount (booo!) but passed Morale (yay!) and they stay on the board. |
TURN TWO - More of the same. It becomes very apparent that even with the T-72s bigger guns, the WarPact ground forces cannot penetrate the Challengers from the front. Have to get into side shots, or hit them with artillery or air strikes (which is still side shots or top shots). Even getting one company worth of T-55s into side shot territory on the Challengers is not a guarantee for anything, as Darkness and Slow Firing and Cover conspire to keep them from getting only one hit which resulted in a Bail. The answer to the WarPact Tank Horde is either a horde of your own (infantry or other low cost tanks like Pattons, Leopard Is, or AMX-30s) or enough later generation tanks (M1A1 Abrams, Leopard IIs, Challengers) that have high enough Front Armor that the guns on most horde tanks just cannot penetrate. Of course, those later generation tanks are expensive enough that you really only start seeing enough of them in army lists starting at 125 points.
 |
| Second verse, same as the first! |
 |
| T-55s maneuver to get shots on the Challengers. |
 |
| Su-22 Fitters show up to rain some hate on the Chally command element, removing them from the field. |
 |
| T-72s and Spandrels moving to get shots. |
 |
| More WarPact Units moving in the WarPact mid-right. |
 |
| T-55s and BMPs close in on the Marksmen, ignoring the Bogged Scorpion. |
 |
| Some of these T-55s are still in this chunk of trees by the end of the game. |
 |
| T-55s surround Challys. |
 |
| Even Ranged In, WarPact inflicts nothing on these Challys. |
 |
| T-72s take their shot. |
 |
| DANAs take their shot. |
 |
| BMPs dish out some pain to the Scorpions. |
 |
| (sorry for the blur) BMPs try to shoot up the Marksmen. |
 |
| Yup, still surrounded. |
 |
| Coming out of cover was their mistake. |
 |
| T-72s lose a track to Chally fire. |
 |
| Scorpions lose two out of three. |
 |
| For one Bailed Chally, WarPact loses two T-55s with another Bailed. |
 |
| Marksmen: "I said BRRRRRRRRT!" |
TURN THREE ONWARD - This is where my interest in this fight waned. Between the high Armor ratings of the Challengers, and the difficulties with WarPact night vision technology, the remainder of the game is a bit of a slog. Uriah's Brits used cover and small, tactical movements to keep the Challengers facing forward and denying any side shots to the tanks, while artillery and air support vainly tried to get enough hits to finally force units to Bail or be Destroyed. The cover of night helped in a big way and lasted until Turn Four or Five, which is when the tide really turned against the stalwart British soldiers. Poor Brandon's Poles, constantly failing Cross Checks and between the poor night vision equipment and heavy, heavy Front Armor of the Challengers, could not get enough tanks to make it around the flanks for side shots and had to depend on artillery and air assets to to get Top or Side Armor hits and finally whittle down the British in Turn Five to finally concede one of the Objectives at the end of Turn Six due to Unit losses and Withdrawal tokens before the Brits victory on Turn Eight. I am just going to post up the remaining pics of this fight, comment on them, and then do a summary afterwards.
 |
| Turn Three |
 |
| BMPs run, but the T-55s press home the attack on the Marksmen |
 |
| "Surrounded" or "target-rich environment"? |
 |
| Artillery, having lost their spotter, advance to provide direct fire support |
 |
| Spandrels trying to get line of sight while hewing to cover |
 |
| Gaskins move up - no British air means they're not terribly useful |
 |
| "Come on, let's charge!" "Sure, you go first..." |
 |
| BRDMs sneak around the flank to contest the Objective |
 |
| Another angle of the NATO right/WarPact left Objective schwerpunkt |
 |
| The other Objective, as the T-55s finally manage to Destroy one Challenger |
 |
| The Marksmen perish under intense T-55 cannon fire |
 |
| The T-62s rushing WarPact left Objective have taken a hell of a beating |
 |
| Challengers catching artillery and blowing up BRDMs |
 |
| The Challengers reposition and exact a terrible toll for the loss of but one of their own |
 |
| T-62s and BMPs moving foward, one burning BMP from Scorpion fire |
 |
| Turn Four |
 |
| Into the woods... and immediately bog; Brandon (all of us, really) had forgotten the Cross Here Movement Order, and it was costing him with the T-55s' 4+ Cross Check |
 |
| The last two T-55s on this flank (almost) break free from the woods they started in |
 |
| Yes, the Su-22s, the Carnations, and the BMPs are all gunning for the last two Scorpions |
 |
| "I didn't know how many it was going to take to beat me, but I knew how many they were going to use. That's some important information to have, right there." - Ron White |
 |
| The T-62s try to come to grips with the Challengers and find the way clogged with dead T-55s |
 |
| Yes, that is a M60A2 "Spaceship" Patton turret, Brandon uses those to mark command tracks |
 |
| They Remounted just to Bog on the crater in the road |
 |
| The Gaskins charge in the open - we don't track points so it's not really "feeding" |
 |
| The T-55s are still trying to find a way onto the flanks of the Challengers |
 |
| BRDMs contest the Objective, but have moved too close and now that Ranged In marker can't be used |
 |
| DANAs smoke the Challengers |
 |
| The last two Scorpions are finally Destroyed |
 |
| The last T-55s from one Unit fail Morale and book, leaving two more T-55 Units, and one of T-62s to contest this Objective |
 |
| Challengers put their backs to the wall |
 |
| Turn Five |
 |
| Artillery shifts their aim (to stay out of Danger Close range of the BRDMs) and manages to Bail a Challenger |
 |
| Still standing T-62s shift position |
 |
| Even more Bogged T-55s |
 |
| The T-62s (the burning T-55s are all that remain of those Units) swarm closer |
 |
| Everyone is gunning for these Challengers |
 |
| This Unit of T-62s is done as well |
 |
| These T-55s got some shots off and then perished - they were targeted as they are in position for Side Armor shots, while the BMPs and T-62s are not, and not a threat |
 |
| Turn Six |
 |
| The T-55s maneuver ready to enact a Dash to the flanks of the Challengers |
 |
| The Su-22s return, while the BRDMs retreat to give them room to work |
 |
| The T-55s on this flank continue to Bog, but manage to Remount one track |
 |
| This poor T-55 never left these woods all game... but at least they're still alive |
 |
| The Su-22s manage to Bail two Challengers, NATO right/WarPact left |
 |
| The Soviet T-62 commander says "forget firing, call in the artillery!" |
 |
| The Challengers, NATO right/WarPact left, fail to Remount and then fail Morale, exiting the field |
 |
| Leaving this the last remaining British Unit - we did not bother checking Force Morale, as there was no way Uriah could cover both Objectives in time or withstand every enemy Unit gunning for them over the next two Turns |
And that is where we ended it - Brandon's Polish/Soviet WarPact Force had finally, with the arrival of daylight and lots and lots of air strikes and winnowing of the support Units, gotten to a winning state. After failing Morale with the second to last Challenger Unit, Uriah would have to both pass Force Morale (possible), survive all the incoming fire over the next two Turns from EVERY enemy Unit still on the board (also possible, Challengers are tough), and then still lose anyway as there was no way to destroy every Unit on this end of the table while running to the other side to destroy all of the Units on that end of the table or get close enough of the other Objective to contest it.
So, lessons learned - more Units are better in many situations. Yes, if Uriah had started with even two more Units (a real possibility, considering the Force he did Deploy being well under the 125 point game limit), he would have been forced to Withdraw some of his Units at some point during the game (even earning Withdrawal Tokens many Turns, he was always under the "six Units/Tokens max" on any given Turn as he lost too many Units across the game), but that does not start until Turn Two, giving you more flexibility. And if he had brought an infantry-heavy list with many, MANY small Units, you could ablate small Units across the breadth of the game and kept multiple Units on the field by the end of Turn Eight to win. At the same time, bringing Challengers out proved to be very frustrating for Brandon's Force - not one of his Units had a high enough AT to even threaten the Challengers from the Front. All of the Challenger Bails/Destroys were from Side or Top Armor shot and from artillery or air strikes. Even the larger 115mm cannons on the T-62s have a slightly higher AT compared to the Challenger Front Armor, but just by 1 point (21 AT vs 20 FA), so the best they can hope for is a Bail. But even at 125 points, do you get enough supporting elements to keep the bad guys off your Challengers' flanks? So that is the gamble - will we get Fighting Withdrawal as this game's Mission? If you are NATO and bringing a small number of Units like this, you may want to pick Attack or Maneuver, as the only time Fighting Withdrawal will show up as an option is if WarPact also picks Defend, and then if Fighting Withdrawal is rolled, WarPact will have to deal with the Withdrawal rules as the Defender. Of course, that choice only accounts for Fighting Withdrawal, and does not account the other Missions you may get, but that is where the gamble comes in.
In addition, and I am as guilty of this as the rest of you, DO NOT FORGET YOUR MOVEMENT ORDERS!!! Do you have ATGM firing vehicles that need to be stationary to shoot? If they start the Turn and go before the enemy, then fire them and then Shoot 'n' Scoot them back into full cover (also helpful for any vehicle near cover - if they can't shoot you, they can't hit you). Or if you are following in Turn order, start them in cover, and Blitz them to come out of cover and shoot. Repeat in reverse next Turn. If your vehicles are constantly failing Cross Checks, use Cross Here. Follow Me is useful if you need just a few more inches/centimeters to unmask more of your guns. This Unit of Infantry is where they need to be, but there's no one to shoot at now, so they should Dig In while they have the chance, or if there is a Minefield in the way, can they clear it out of the way so your faster Units can go where they want? Should every one of your Units be using a Movement Order each and every Turn? No, but you should have at least one Unit using something every Turn until it just becomes second nature to be using them throughout a game.
Having said that, I do feel like I want to sit down and do a study on the rules with our little group, walk through each rule and special ability for all the Teams. Or maybe I should just watch the Team Yankee tutorials video series, even though it is a version out of date. Admittedly, there was not many changes between v1 and v2 Team Yankee, I still feel like I would learn it better if I have the "muscle memory" of doing it myself instead of just watching someone else do it (not to say those are not good videos, they are great and you should watch them if you have not run across them yourself). Just something I ponder on in between game days. Ah well.
Okay, enough quibbling. Go out there and play some games with your friends!


No comments:
Post a Comment