I know it's been a bit since I've posted one of these, loyal readers, but all I can say is life is interesting of late. And remember, "may you live in interesting times" was an ancient Chinese curse, not a blessing.
Another month, another game of teeny tiny tanks, specifically our favorite ruleset, Team Yankee in 6mm scale. We had four players this month, myself, the ever-reliable Uriah and Brandon, and Brandon's teenaged son Logan. To get everyone playing, I declared it would be a 2v2 match, 50 points per player. I would take Logan on my team and as Uriah prefers his British Force (he is working up some French, as well) I said we would play Warsaw Pact versus their NATO lists. As I have plenty of teeny tiny tanks at my disposal, I have plenty of WarPact to go around, and Brandon is likewise known to purchase and print many vehicles across the entire line of TY, so no issues there.
Warsaw Pact - for Logan, I gave him a simple East German list I had used before. T72 formation, tank heavy, no artillery or air support, but good amount of Units and firepower.
- Battalion HQ - 1x T72M tank
- 1st Company - 4x T72M tanks
- 2nd Company - 4x T72M tanks
- 3rd Company - 4x T72M tanks
- Recon - 4x BMP-1s
- BMP Motor Rifle Company - 4x BMP-1s, 4x rifle stands, 3x RPG-7 stands
- AA - 2x ZSU-23-4 Shilkas
- ATGM - 3x Spandrels (from Divisional Support)
It's not the best, especially if you were to try to run it in a tournament setting, as this Force's main strength is the ablative nature of having so many cheap, not-top-tier vehicles on the board - you may win, but you will lose so many Units, the best you can hope for is a 7-2 or a 6-3 Victory. However, it is a great Force for new players, as there is just a few rules you have to deal with. Thinking back, if I were to make any changes, I would drop the Spandrels entirely as it's not like I don't already have enough cannons (the 125mm on the T72 at AT 21 is nothing to sneeze at) and add 2 more Shilka tracks in. In fact, I'm making the change in my Forces list right now.
For my own Force, I picked T64BVs from the Soviets - they're a great, cheap tank, about halfway between cheap throwaways, like the T72M, and top tier tanks like the M1A1 Abrams. They have a terrific gun, really decent armor (not high, but better enough to be able to survive big NATO cannon fire, though not the super-advanced ATGMs you see in top tier games) and are understandably cheap.
- Battalion HQ - 1x T64BV
- 1st Company - 3x T64BV
- 2nd Company - 3x T64BV
- BMP Motor Rifle Company - 4x BMP-1s, 4x rifle stands, 3x RPG-7 stands
- Recon - 2x BMP-1s
- AA - 4x SA-13 Gophers
I originally had Shilkas in the AA slot, but as I only have 4 Shilka minis in my vast collection (I know, need another 4 Shilkas to add to the collection... sigh) and knowing that NATO would be bringing some air assets, decided to take some missile AA and threaten a greater slice of the table. Again, this is a very basic list - no artillery, no air, just a little bit of the basics (tank, infantry, recon, AA), and even better, there's nothing from Divisional Support so EVERYTHING counts towards Formation Morale. The Spandrels in the East German list are really there to use up the last 2 points to make the list an even 50 points, and so when I run that list, I tend to run the Spandrels very far forward, as I really don't care if they die or not. We tend not to pay attention to VPs anyway, so they are very much sacrificial lambs to me, and if they manage to take out anything on the opposing side before they die, it was the best 2 points I spent that game. And remember, if your ATGM has Guided in the description (I think they all do, but I could be wrong), you can use them against helicopters as well, poor man's anti-helicopter AA.
NATO - Uriah has been faithfully playing British the entire time our small group of TY in 6mm scale players have been meeting, and one of the biggest problems he has faced is that, 1) the Brits have no good low tier tanks (the Americans have the M60 Pattons, and pretty much all the other NATO forces have either the Leopard 1 or a Warsaw Pact option), and 2) he hates infantry in 6mm scale and refuses to field them. At low point totals like in the 50 point per player we played in this game, he suffers. Yes, he could totally have fielded a Medium Recce Squadron or Wheeled Recce Squadron (or multiples of each, combos of each, etc) and just put a metric ton of "cockroaches" onto the table, but he doesn't like that much either. Admittedly, the Brit recce vehicles are all SCREAMINGLY hard to kill (hence why we call them "cockroaches") but they are not very effective at killing enemy tanks in return, even mid-tier WarPact tanks like the T72M, so you'd be better off pairing them with MILAN infantry (but again, see above) or other cheap ATGM vehicles, but you can't take enough of those from Divisional Support or cross-formation. Maybe a Troop of Chieftains and let the Recce be the main Formation. All of the above reasons are why he is also building a French Force in 6mm.
- Squadron HQ - 1x Chieftain
- 1st Troop - 2x Chieftains
- 2nd Troop - 2x Chieftains
- Recce Troop - 2x Scorpions
- AA - 3x Marksmen (DivSup)
- Strike Air - 2x Harrier (DivSup)
- Helos - 2x TOW Lynx (DivSup)
Brandon had just printed up some S-tanks (Stridsvagn 103s, those funky, turretless defense tanks that literally move the whole tank to aim the cannon) and really wanted to play those. He, like pretty much the rest of us at such a low point total, went tank heavy, with the bare minimum of support, which you'll see in a moment, really restricted his gameplan. But, I have to admit, the S-tank is a fantastic looking tank, really innovative design, and if they are set up correctly in defense (firing from cover to enable their Ambush Tank ability), they are utter BASTARDS to kill.
- HQ - 2x Strv 103s
- 1st Tank Platoon - 3x Strv 103s
- 2nd Tank Platoon - 3x Strv 103s
- AT Platoon - 3x Pvpjtgb RBS-56 BILL Missile (DivSup)
- Helos - 2x HKP 9s
Setup - Here is my one and only warning - I do not "mansplain". Mansplaining is when some over-testosteroned knuckle-dragger explains everything to every woman he runs into as if she was 5 years old. I do not mansplain, but instead, I "NCO-splain". I am a former Non-Commissioned Officer (NCO) of the US Army, so I have been trained to be the babysitter to nearly everyone around me, junior enlisted and officers especially. When I am in a situation where I am instructing someone, like I was doing with young Logan, I tend to revert to my Staff Sergeant years. So if you just hear me instructing in the most condescending tone possible while you are reading this, you probably got it right. Remember, I don't "mansplain", I "NCO-splain", because I'm a professional asshole.
Anyway, the table was, as is our usual, utterly full of trees, rocks, and hills. As surprised no one, and like I instructed Logan, NATO picked Defense and we picked Attack as the Warsaw Pact. A die was rolled and No Retreat was the result. Wait, did I say No Retreat?
 |
| Yeah, I said No Retreat |
For the unfortunate NATO players, No Retreat should have been a bigger hindrance to us WarPact players in this smaller scale. As we halve all distances (except weapon ranges), it would take us poor Soviet conscripts and puppet states longer to get across the table and start threatening Objectives. However, that downside for the Attacker (WarPact) comes with a HUGE downside for the Defenders (NATO) - Deep Reserves. Deep Immediate Reserves which is not the worst, but Deep Reserves nonetheless - you can only Deploy only one Tank Unit with Front Armor greater than 4 OR only one air Unit. I'll let you scroll back up and refresh your memory of the NATO Formations they had chosen to bring to the fight. Take your time.
Right?! The Brits can only deploy either a Troop of Chieftain or the Harriers or the Lynxes (Lynxii? internet search says "lynxes" or "lynx") and the Scorpions and Marksmen. The Swedes can only deploy a Troop of S-tanks or the helos, and the Pvpt... Pbws... the BILL missile jeeps. Yes, they get an Ambush Unit, but with their Unit makeup, this type of Reserve utterly hampered their Defense plans. To be honest, Logan and I were gracious and let them each deploy a Deep Unit and each have an Ambush Unit, because if we hadn't, it would have been an even quicker game than it turned out to be.
Next lesson for our young gentleman - there are two ways to place the Objectives. You either place them as far apart from each other or you place them as close together. The first one is if you are Attacking, so you divide the Defenders up and they can't support each other in Defense of those Objectives. The second one is if you're Defending, you place them as close together as you can manage, to give mutually supporting fire from the most Units. For No Retreat, Defenders place an Objective then the Attackers place one. As Brandon is a wily player, he placed their Objective as far back in the box as possible, however he put it off to one side where I would have split the difference and put it right in the middle of the box, to keep the Objectives as close to each other as possible. However, he was not playing as competitively as he could have, so his placement and my placement kept the game almost split down the middle - Logan vs Uriah and me vs Brandon, with only a few shots coming across the table. I placed our Objective as far from the NATO Objective as I could get, as far out of cover and concealing terrain as I could get.
As expected, Brandon had his BILL jeeps (Ambush, great idea for ATGM vehicles) and one Troop of S-tanks on the table and everything else in Reserve. Surprising, Uriah did not bring out the Marksmen... but as I double check their card in Forces, Marksmen have a 6 Front Armor. I forget they are on a Chieftain hull and the armor stat is a combination of the heavily armored hull and lightly armored turret. Okay, hindsight, not a surprise after all. Uriah had his Recce Troop of Scorpions as far forward as he could get them (rant incoming in a moment) in the Deployment zone and held his one allowed Chieftain Troop in Ambush.
Spearhead Rant - I always try to put at least one Unit, more at about 85 points and higher, but find that I use it in less than half the games I play. As we are playing the latest Missions Pack from Battlefront, many of them don't have enough standoff between the Deployment Zones to allow any use of Spearhead. But I still bring a Spearhead Unit in every list, because when I can use it, the Spearhead Ability is fantastically useful. We actually get more use out of Spearhead at 6mm scale because every measurement is halved which includes Ambush and Spearhead Deployment distances, yet I did not use the Ability in the game, as the Deep Reserves rule had already made it so difficult for the NATO Forces.
For the Warsaw Pact Deployment, I advised young Logan our best bet is to make one big skirmish line, get every Unit as far forward in the Deployment Zone and then push on the Objectives as best as possible. He had further to go, but had more Teams and Units to throw at the problem. And with as much terrain as we had put on the table, it was going to be at least one Turn of Dash movement due to not being able to get into any good Shooting positions. Besides, our goal was simple - get onto one or both Objectives as soon as possible and overwhelm the Defenders, preferably before they get all their Reserves onto the table.
 |
| It's a long way, to Tipperary... |
 |
| My Soviet Force. I know, I know, need to at least get a base coat on them... |
 |
| Logan's East Germans. |
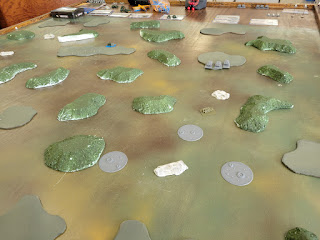 |
| The Objective on NATO Left, protected by minefields and S-tanks. |
 |
| The Objective on NATO Right, with a minefield and Scorpions up front. |
 |
| The British Ambush and Reserves waiting to come onto table. |
 |
| And the Swedes doing the same. |
TURN ONE - Warsaw Pact is Attacker and we get to go first. The plan is simple - rush down the table as fast and as far as possible while sticking to cover and only when we start to approach the Objectives do we pop out to start Shooting. And that is what Logan and I do for the first Turn, Dash Dash Dash and no Shooting at anything.
NATO's side of the Turn, and they roll for Reserves, really needing some (and yes, we were gracious and let both Brandon and Uriah roll separately), but they got none, zero, zilch, squat. Just a little panicked now, because I know I was feeling some sympathy for them at the weight of men and equipment bearing down on them, Brandon and Uriah set to work. Out come the Ambush Units, the BILL Missile jeeps (yes, I know, they're not M151 Mutts, the venerable US Jeep, but it's easier than trying to type out the alphabet soup of the Swedish nomenclature for them) (by the way, if you've never heard of Dr. Jackson Crawford, otherwise known as Dr. Cowboy Viking, you should really check out his YT channel on the Old Norse language, which isn't what modern Swedes speak, but a lot closer than any of the Romance languages or English I can halfway speak/understand) facing down my infantry-carrying BMP-1s at WarPact extreme Right, and Uriah's Chieftains in the middle of the table with a shot on my Gophers... wait, my Gophers?! Yup, he'd found a firing lane that caught one of my SA-13 Gopher SAM tracks full on in the open, even though I'd tried my damnedest to keep them well out of sight for the inevitable appearance of enemy air Units. Shooting commenced, and I lost one BMP-1 and a stand of infantry to the BILL jeeps, both of my BMP-1 recon tracks to Brandon's S-tanks, and 3 of my 4 Gophers to Uriah's well sited Chieftains. NATO put the first score up on the board and it stung to be the center of attention. But I couldn't blame them, I was closer to an Objective than Logan, and obviously the more immediate threat.
 |
| Turn One... Let's Get it On! |
 |
| The Soviets advance WarPact Right. |
 |
| The East Germans advance WarPact Left |
 |
| Why am I getting all the love? |
 |
| A heroes' burial for these brave defenders of the Motherland (don't ask why they're invading other countries as a "defense") |
TURN TWO - Okay, this got real serious. No Remounts, Reserves, or Strike Aircraft, but I do manage to UnPin my infantry and moved them immediately into the empty seat of a nearby BMP-1, and my last Gopher foolishly decides to stick around (passed Unit Morale). Logan continues to advance at Dash, ignoring the Scorpions off to his right and streaming towards the far Objective. I push up at Tactical, Bogging several T64BVs in the treeline, and shoot at the BILL jeeps and S-tanks to my front to no effect. I don't know if it was this Turn or last, but for at least two Turns and maybe three, I continued to fail all rolls, notably Armor Saves and To Hit rolls. Which is usual for how I roll dice. Side note - looking again at the pictures, Logan had his Motor Rifle BMPs forward, which is good to get the infantry into the fight as early as possible, but his recon BMPs are behind his tanks. I tend to use my recon elements as a screening force for my bigger guns, the ablative meat shield at the front of the Force, which we've discovered only blocks your own shots through the Unit, as your opponent can shoot through your Unit and into a Unit behind it, but I still do it as most people tend to shoot at the closer target instead of the more dangerous target. However, this was his Force to play, and so I made some suggestions every Turn, but otherwise left him to run his army as he saw fit.
NATO side of the Turn, and this time, both rolling two dice, they both get one Unit of Reserves, Uriah picking his other Troop of Chieftains, and Brandon picking his other Platoon of S-tanks. Both Units come in on NATO Right as Brandon felt he'd speed-bumped my Soviets enough that I was no longer the biggest threat and the other Objective seemed to be almost completely uncovered. Uriah further adjusted his Chieftains, moving one out of Command Distance so he could cover Logan's advance on NATO Right, and even brought one of his Scorpions out (the other Bogged) of the trees to go after Logan's Shilkas. Logan's turn to catch some love, and loses one of the Shilkas, two BMP-1s from his Motor Rifle Company along with three stands of infantry, while I lose two more BMP-1s, two stands of infantry, and a T64BV.
 |
| Turn Two - Let's Get it On! |
 |
| Soviets advance, shoot, and... nothing. |
 |
| East Germans advance. |
 |
| NATO Reserves entering the fray. |
 |
| NATO repositioning |
 |
| East Germans taking some hits |
 |
| Infantry losses |
 |
| Soviet losses |
 |
| Soviet infantry graveyard |
 |
| East German infantry graveyard |
TURN THREE - As in most games of TY, this is where things really get interesting. The last remaining SA-13 Gopher track finally fails Morale and heads for the hinterlands. The Soviets continue to trickle forward, the T64s still Bogging in the trees more than making it through, but still close enough to move up and start Contesting the Objective. The Soviet infantry pile out of their BMPs and go into Assault on the BILL jeeps in the trees to their front. The East Germans continue to move up on their side, the Motor Rifle BMPs doing a suicide charge at the Chieftain to mirror what the Soviets are about to do this Turn but have to wait next Turn for their chance to pile out and Assault. Shooting phase comes around - Soviets finally manage to hit SOMETHING hiding in the trees and take out one S-tank. The Soviet infantry shoots, misses everything, then Assaults, Destroying one BILL jeep and the other two fall back to consolidate... but fail their Cross Checks, and they're removed. Hey guys! I killed a Unit with Cross Checks! That was an achievement. The East Germans fire, killing a Scorpion (no, Logan's new nickname is not "Cockroach Boy", but it could very well be as they are notoriously hard to kill), and fire on everything else on that side that he could see, but no effects there.
NATO side of the Turn, Brandon gets one and Uriah gets two Reserve Units out of three dice rolled apiece, Uriah picking his Chieftain commander and Harriers as there is exactly one Shilka on the table, the last AA for the Warsaw Pact, and Brandon grabs his S-tank command element. All the newcomers roll up to get shots on targets, and Brandon charges his S-tanks out of the woods nearest the Objective to not let us win automatically at the end of the next Turn. Otherwise, everyone else stays where they are at. (One note here, Shooting had already begun for Uriah's Brits, but Brandon had forgotten to move his S-tanks up to Contest the Objective, in case he didn't outright kill the two T64s in the Shooting Phase. However, since we like playing with our friends and not just beating our enemies, I reminded him of this misstep, and he moved one of the S-tanks up, the other failing the Cross Check to leave the woods. Cross Checks were EVERYONE'S bane this game.) On the WarPact Left side of the table, the Harriers get ready to open fire, and Logan's last remaining Shilka opens up, Destroying one Harrier. However, the remaining Harrier manages to Range In on the first roll and launches his cluster munitions (I can't remember which weapon it is, but it's the Salvo template one), hitting only one T72M, and Bailing it after a failed Armor Save and Firepower Check. Uriah's Chieftains and Brandon's S-tanks open up on Logan's Force, Destroying two T72Ms and Bailing a third out of one company, which didn't put Logan anywhere near having to check for Formation Morale (this is the strength of that list - crunch all you want, we brought more!), and the suicidal Motor Rifle loses their last Transports and another two stands of infantry. Brandon tries to Destroy the two T64s I have Contesting the Objective, and finally, FINALLY, the dice go my way (as well as the extra points for the BV models of T64) and I make all of my Armor Saves. Turn Four is now going to be interesting.
 |
| Turn Three - Let's Get it On! |
 |
| Sorry, didn't get Movement pic and then Shoot/Assault, just skipped straight there. And yes, there are as many Bogged T64s in the trees as there are outside. 3+ Cross my ass... |
 |
| Killing a Scorpion in his first game has made Logan a legend in our group. |
 |
| The rest of the East German advance. |
 |
| Movement over on WarPact Right. |
 |
| Mid-action shot on WarPact Left. |
 |
| The Harriers launch their attack. |
 |
| After the Harrier attack. |
 |
| The S-tanks strike forward. Brandon has to Destroy both T64s Contesting the Objective, but the S-tank that made it out of the woods will at least keep me from auto-winning if those T64s are still there next Turn. |
 |
| And I live! I made all my Armor Saves! |
 |
| Outcome on the other side of the table. |
TURN FOUR - This is it, crunch-time. With me Contesting the Objective on WarPact Right starting last Turn, if I can remove the one S-tank that is within 4' of said Objective (remember, 6mm scale, all distances are halved), then we win the Mission. It is not looking good for NATO at this point, and Logan was questioning the need to do any of his part as it looked like me winning has highly probable. But, we reminded him, always act like the game will continue, so we made him play out his Starting and Movement Phases while I was taking care of mine. Always a good idea to get those repetitions in. Logan Remounts and UnPins everything, and makes his Morale Checks for everything (the last Shilka stuck it out for another Turn, what an absolute champ). On my side of the table, I rush everything up to consolidate on the Objective, finally getting two of my last three T64BVs out of the trees (yes, my Formation Commander stayed Bogged at the end... sigh) and Dashing them up as I couldn't get a clear shot with them anyway. My infantry and their last Transport also double-timed it towards the Objective. Logan continued his push towards the Objective on his side, finally getting Line of Sight with his T72Ms to many of Uriah's Brits and the few S-tanks Brandon had on this side of the board.
Then the Shooting started... and like that, game was over and Warsaw Pact was victorious. S-tanks are very hard to hit, but only if they are in cover and can use their Ambush Tank ability (raises their Hit On from 4+ to 6), and a lone S-tank out in the open like that facing three T64s? Very low probability of survival there. But Brandon had no choice, he had to either remove the two tracks I had already Contesting the Objective last Turn, or failing that, get as many vehicles onto the Objective as well, make me pull them off. Hopefully, all while Uriah is holding Logan's horde of T72s off the other Objective. And having only two vehicles (after I had Destroyed the third S-tank and all of the BILL jeeps) to pile onto the Objective, one of which is stuck in the trees too far away to help, it was too little, too late. Okay, last of the pretty pictures first and then more thoughts on the game.
 |
| Turn Four (and last) - Let's Get it On! |
 |
| The Soviet Pile-on commences. |
 |
| The East Germans advance. And yes, those last 2 stands of infantry were going to take on that Chieftain all by themselves. |
 |
| More East German tomfoolery. |
 |
| And in the end... |
FINAL THOUGHTS - I am by no means a tactical genius, and I completely acknowledge the Mission beat up NATO as much as Logan and I did. The Deep Reserves, especially, and the low point total for the match did Brandon and Uriah no favors. I've already discussed with Uriah about a possible low point list for him with his restrictions in mind - no infantry, but still have enough punch to threaten WarPact MBTs. Here is the list we came up with:
- Medium Recce HQ - 2x Spartans
- 1st Recce Troop - 4x Scorpions
- 2nd Recce Troop - 4x Scorpions
- 3rd Recce Troop - 4x Scorpions
- ATGM Troop - 4x Strikers
- AA Support - 2x Marksmen (DivSup)
- Air Support - 2x Harriers (DivSup)
- Cross Formation - 3x Chieftains
The Scorpions, Scimitars, and Foxes of the British Recce Squadrons are cockroaches, very hard to kill, but not very hard hitting, at least not against tanks. We went with the Medium Recce as they have Striker ATGM carriers for their support option, while the Wheeled Recce has some GPMG troops, and again, no infantry (and not an ATGM option). The Striker isn't the best little ATGM carrier, but AT 23, FP 3+ is nothing to sneeze at. The core Formation is only 23 points, which leaves plenty for 3 Chieftains, and a pair of Harriers, plus some Marksmen for AA duty. The Chieftains and Harriers are the big threat, with the Strikers filling in for some long-range striking power, and the Scorpions being great to either sit in cover and be annoyingly hard to kill or running around the board to strike at the lightly armored targets on the other side of the table. With three Troops of them, you can fulfill both tasks at the same time. I'm looking forward to facing it at some point. And do any of us have enough Scorpions for Uriah to use? Yes. I've got 20 (and another 20 Scimitars) in my collection.
Other than that, the dice were everyone's enemy, none of us had consistent good luck. I don't know how either side could have played it differently. Yes, NATO could have pulled Reserves first Turn, or even more Units on Turns Two and Three, but again, the dice were fickle. Brandon and Uriah could have changed up their lists, but they would have had to know beforehand which Mission we were playing, and that's part of the gamble of playing the game the way we do - none of us do, it's completely up to random chance, and you have to be ready for any eventuality. If NATO had gotten a non-Deep Reserve Mission, started the game with 30 points on table and no Front Armor/Aircraft restrictions, WarPact would have had a much tougher time. I'd have come to the Objective with two platoons of S-tanks and ATGM toting helos in support, not to mention the BILL jeeps, and that would have been a war of attrition I don't know I could survive with only 7 tanks and an infantry platoon to break them.
Speaking of the BILL jeeps, Brandon's use of them as speed bumps for my infantry was fantastic. Well, for him, not so much for me, as he completely stalled my infantry rush up the WarPact Right side of the table. My plan was for the tanks to take Brandon's attention and then, before he realized it, my infantry would be on top of the Objective and Dug In. But that didn't happen. It was very satisfying to Assault his jeeps at the end, they were SSSOOO annoying.
That's it for this BatRep. I hope to get more posts up here on the site, but life has not been the most cooperative this year. Oh well, it goes like that sometimes. Until next time, hope you can get some games in and roll some dice with your friends!


